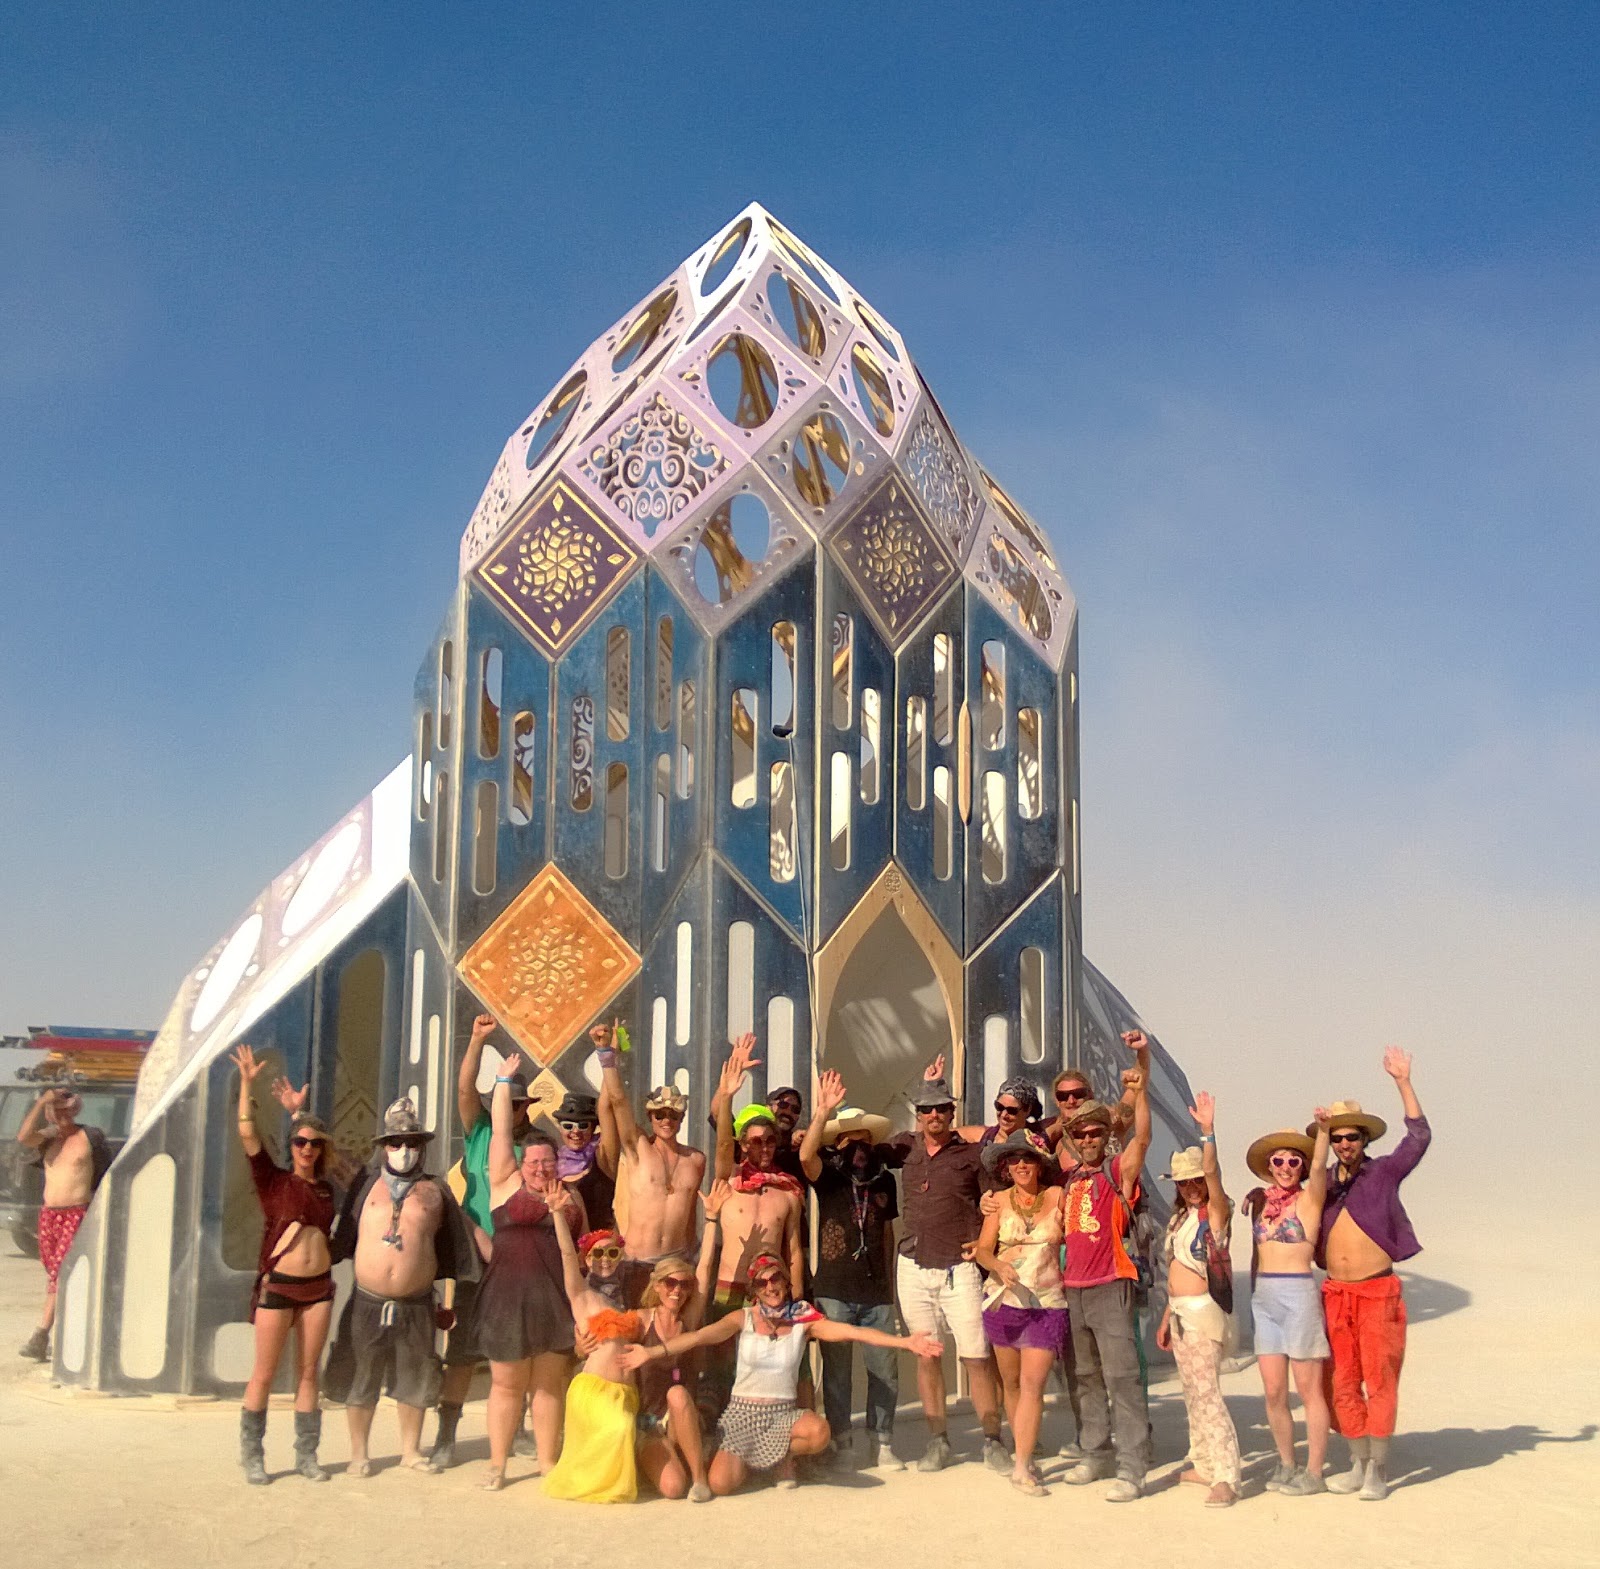
A few years ago I was thinking about how to build a polar zonohedron similar to Rob Bell’s (Zomadic) Zomes. I had been to Rob’s workshop many times—my brother-in-law had a woodworking shop next door to his and found the shapes and his process for making them fascinating.
He generated the 3d models using a SketchUp plugin he created and then fine-tuned them according to the application. Sometimes he would combine multiple PZ’s to create more complex environments or he would extend a side or two to suit his whims. Once the general shape or solid was conceived he would use his proprietary connection system to build panels and connectors cut from plywood using a CNC machine.
Sometimes he’d paint them and sometimes he’d leave them bare. They were beautiful and transformative architectural structures that evoked a spiritual experience in me and I wanted to understand more about them.
I dreamt about making one for a while and thought it would be practical for me to do the shape out of tubes or rods and plumbing-like fittings. I did some research on how to make custom connectors but didn’t find anything out there. Most connectors with unusual geometry are made for geodesic domes or cubic frames. I thought, maybe I could 3d print custom connectors. It seemed reasonable. I didn’t have a 3d printer and wasn’t very familiar with how 3d printing works. However, I did have a little bit of CAD experience from doing some projects around the house, so I figured it couldn’t be that hard.
I started designing PZ models from scratch using a YouTube tutorial I found for doing it in SketchUp. I’d draw up the shape and once I had one I liked, I’d start the process of tracing the connectors over each of the vertices using a tube plugin. This was a painstaking and lengthy process, but it worked. Once I had designed all the connectors and exported them as printable STL files, I uploaded them to Shapeways and ordered some prints. A few days later I had a proof of concept.
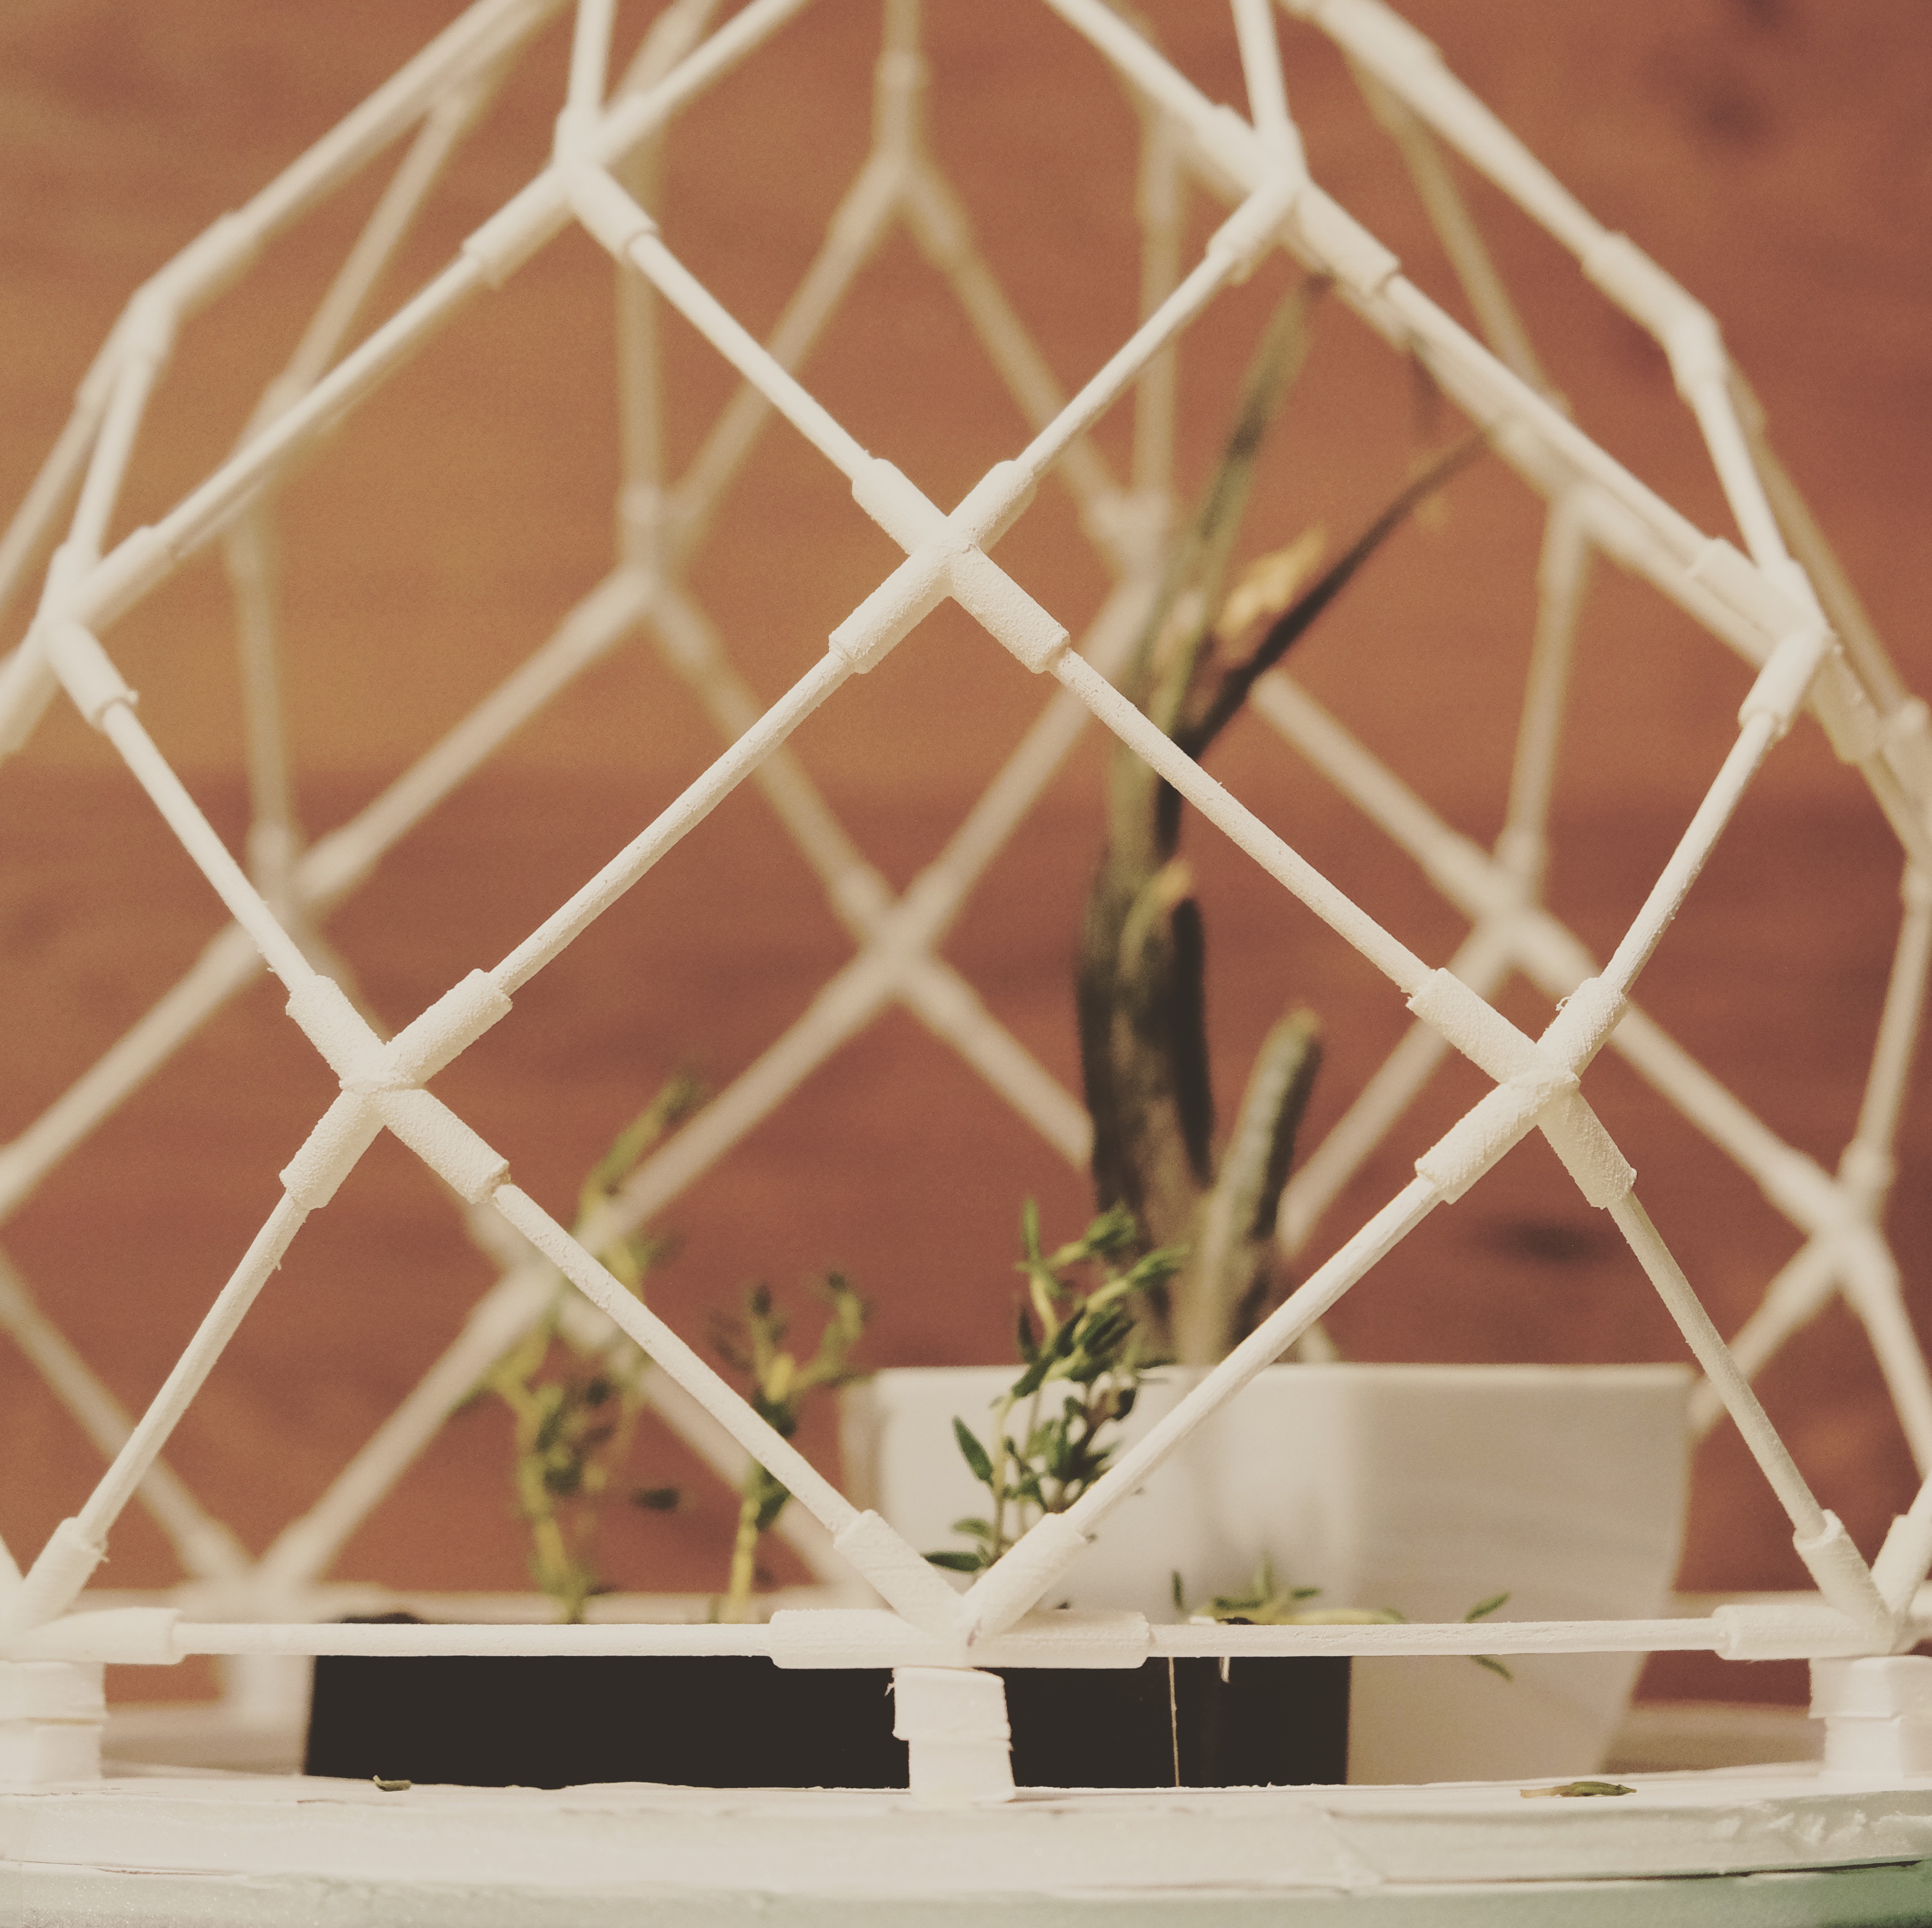
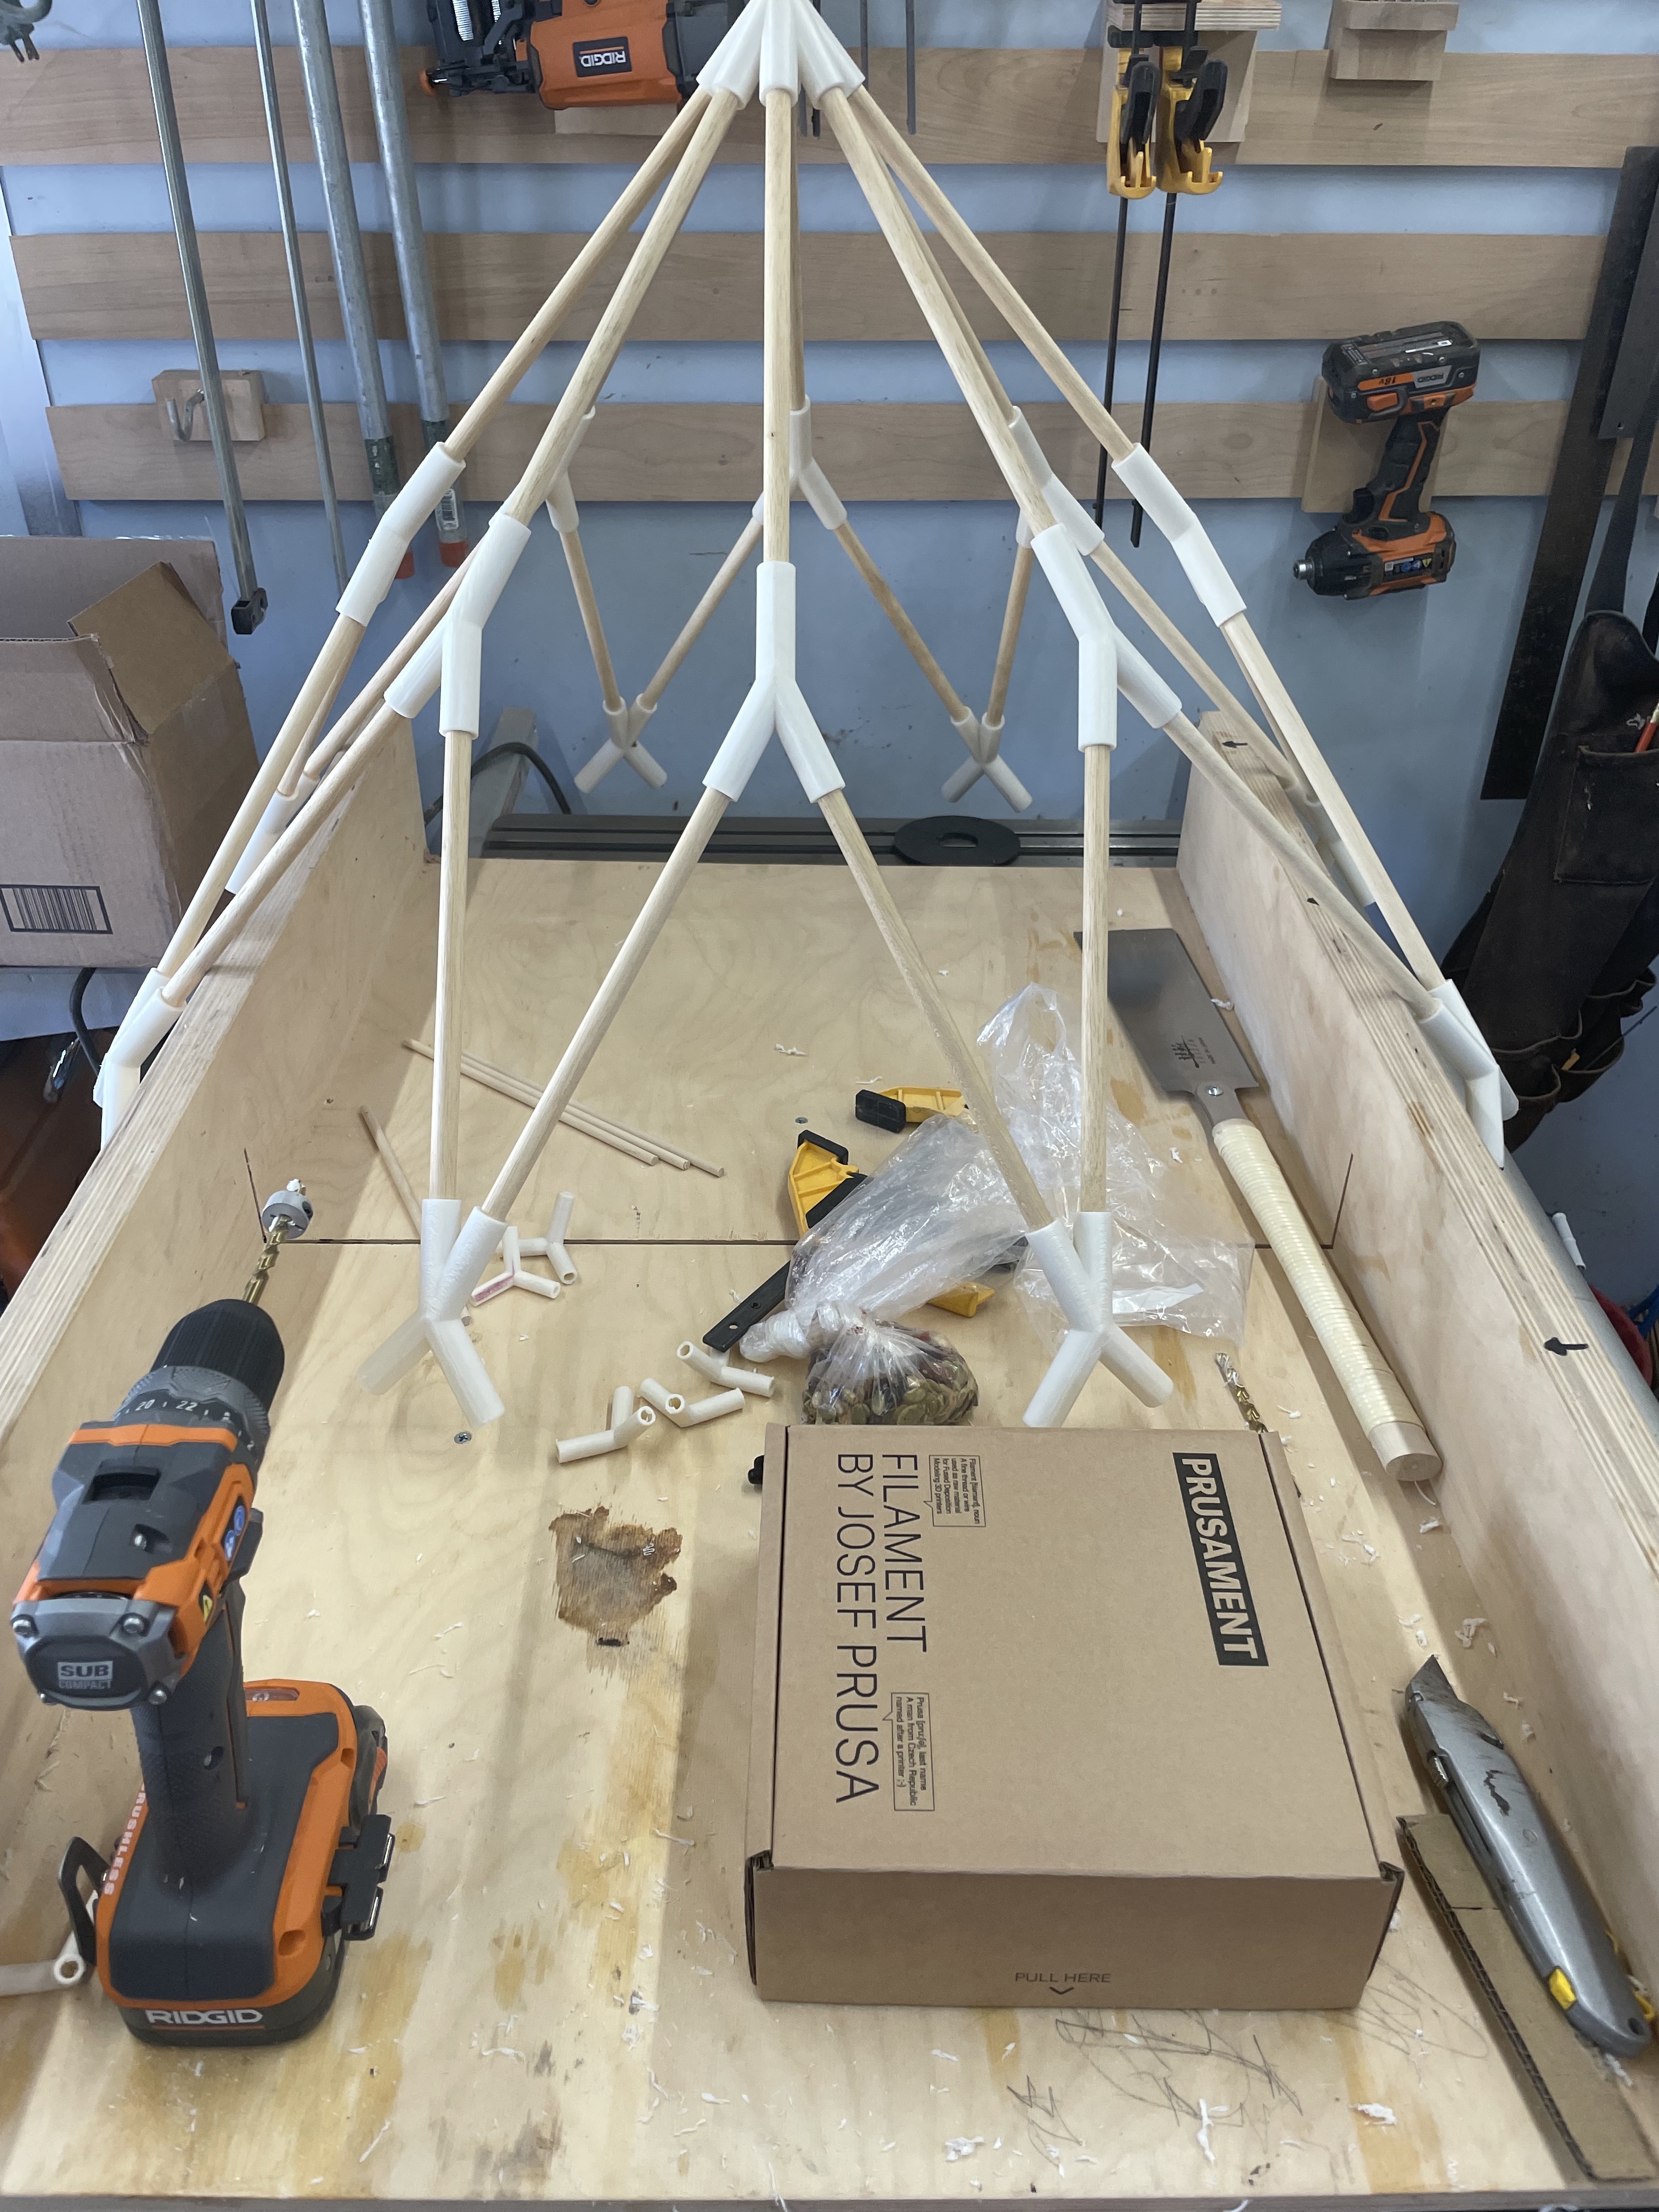
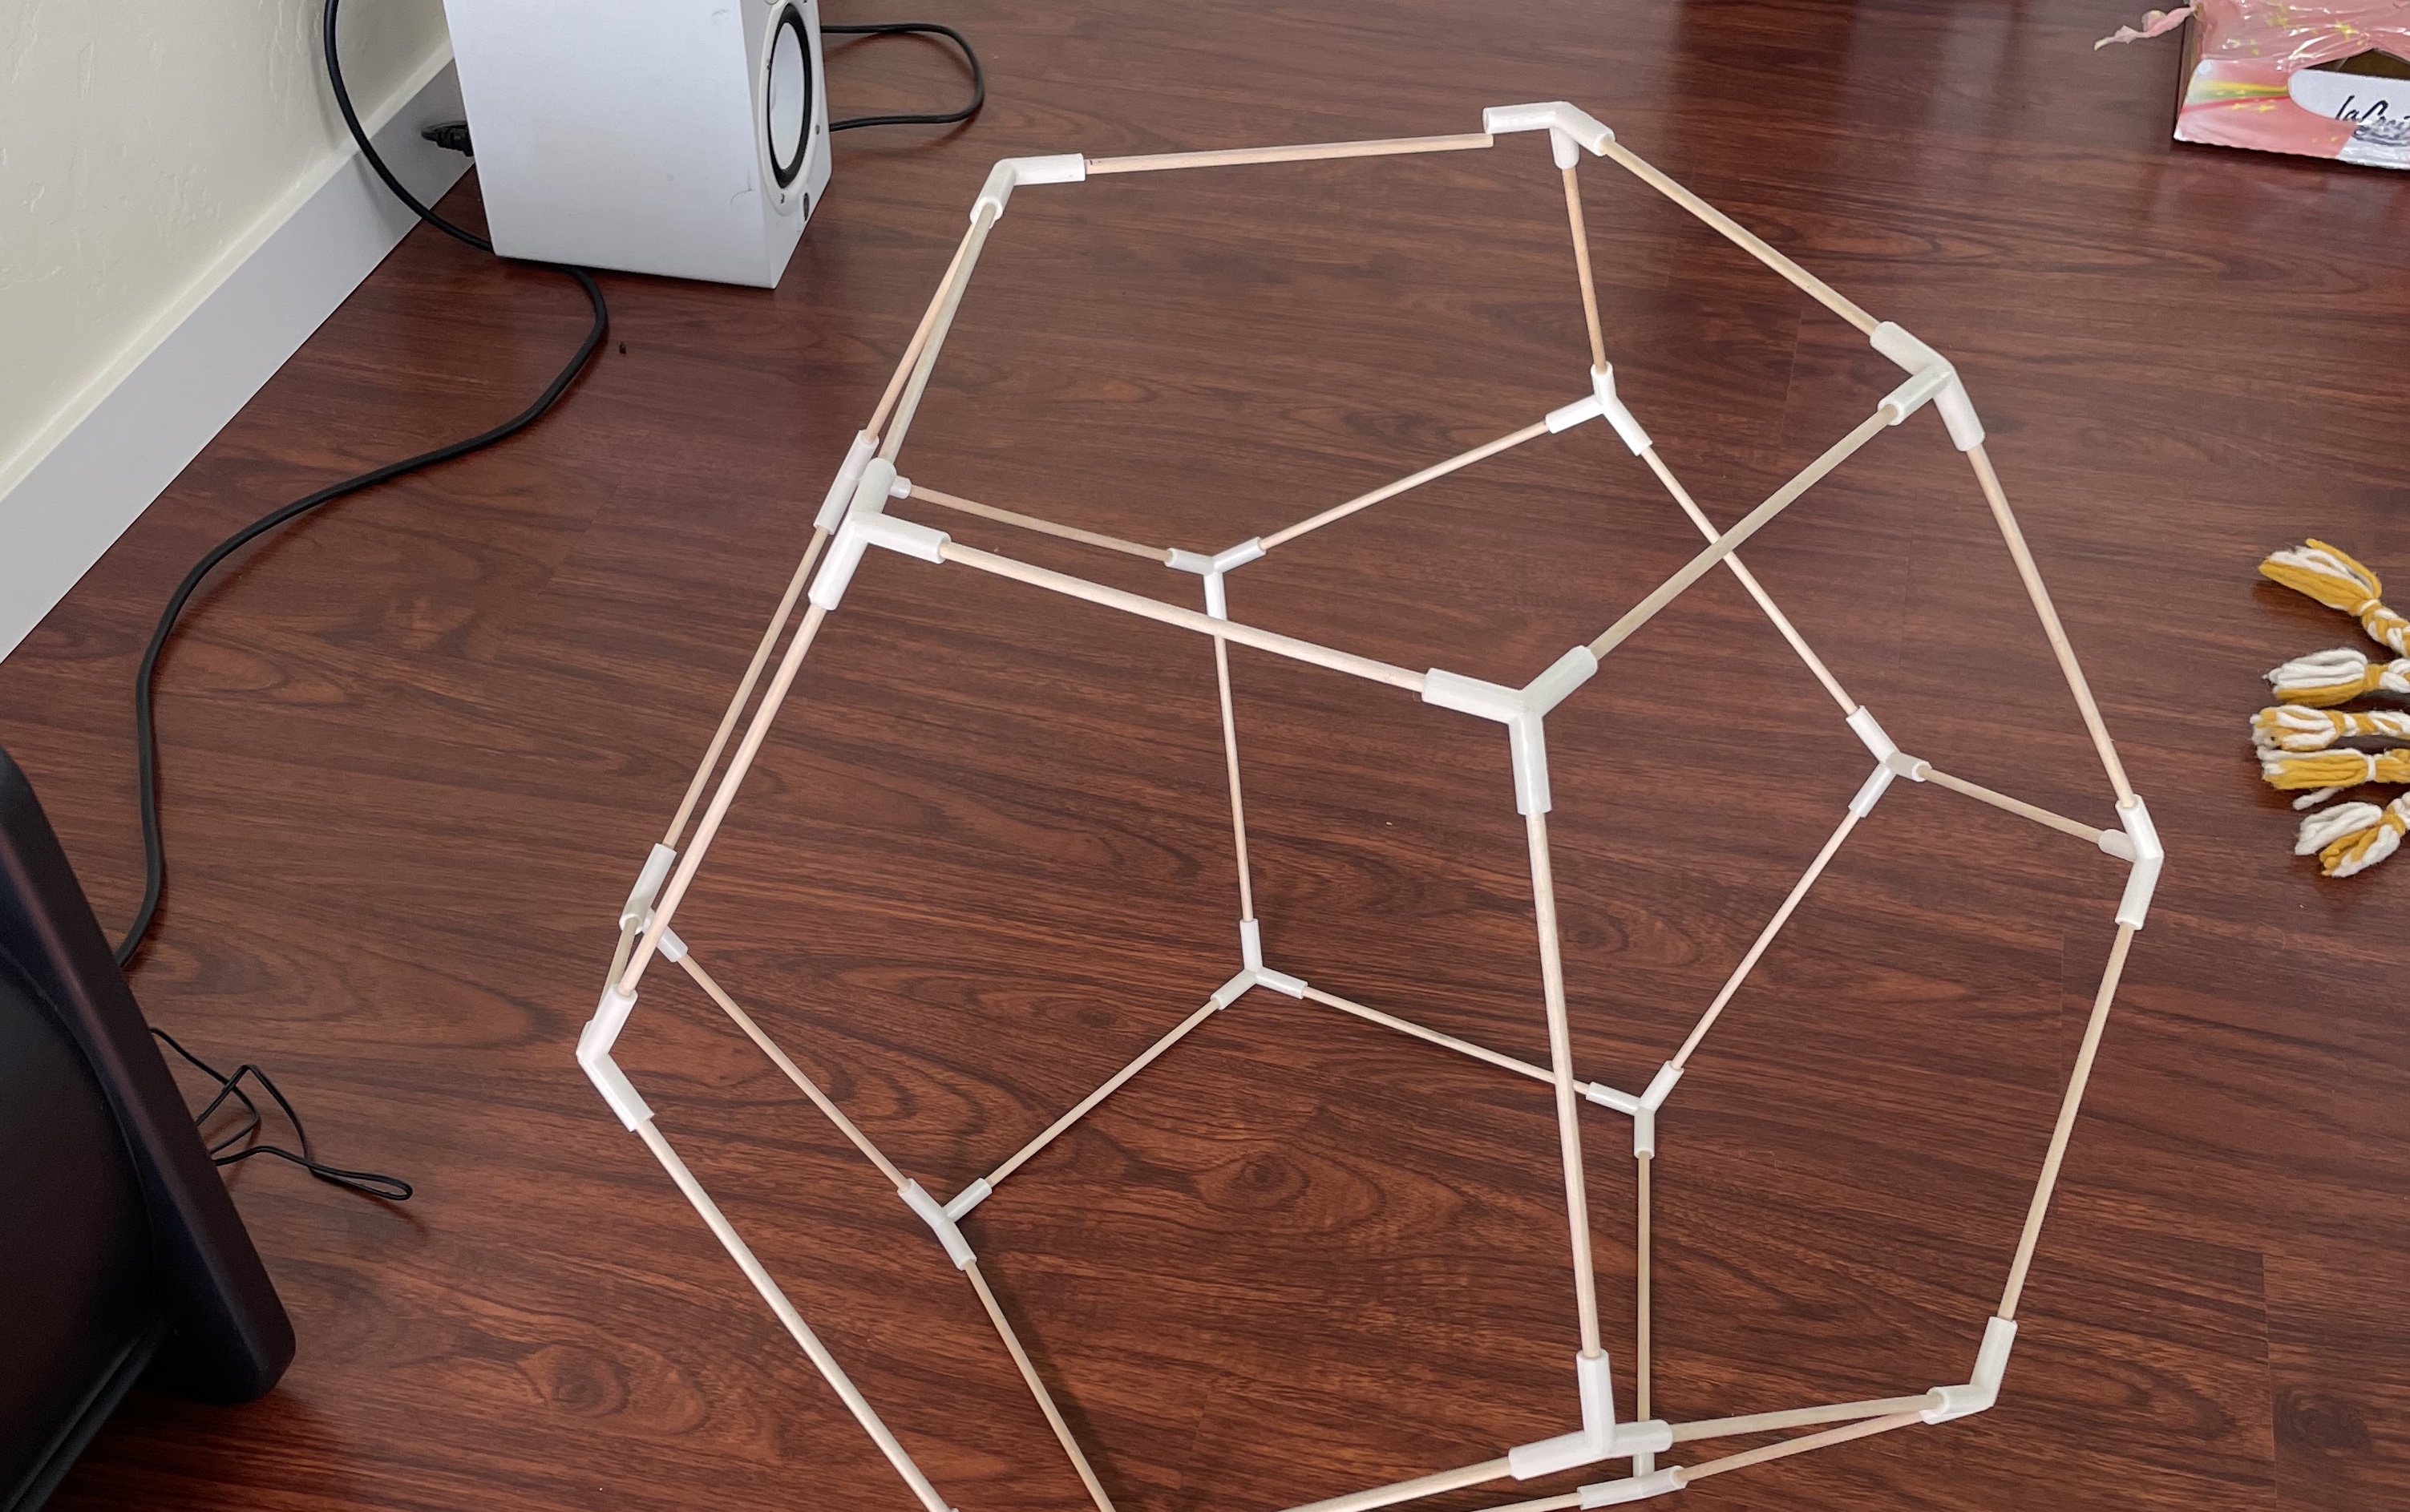
I was pretty blown away with how it all came together. The only things I had to “craft” were the tiny dowels I used for the rods. I cut them all to the same length, except for the base layer rods, which were a little longer than the other rods.
Driven by my curiosity, I played around with other shapes but found the process of actually designing the connectors in CAD too cumbersome and painful. Sometimes if I made a mistake I’d have to start from the beginning and design everything all over. Or, if I wanted to change the diameter of the rods, I’d have to go through a crazy complex process of scaling up or down and adjusting the thickness of the connectors.
I did some research and came across Trammel Hudson’s project, Wireframe. The frame he generated was slightly different from what I was going after, but the general concept was similar—drop in a shape and have a script generate the frame for you, including the 3d printable connectors. He identified some constraints and maybe he thought it was impractical to pursue on a greater scale, but being as naive as I am I decided to see if I could improve upon what he had done, build a GUI for it, and make frames all day long.
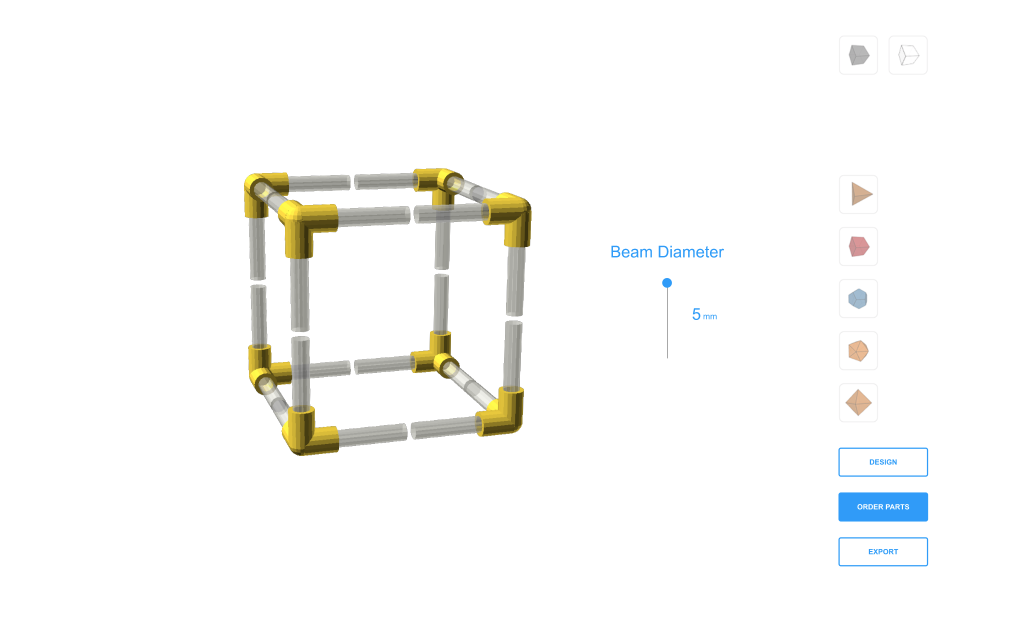
I needed a little help getting over the geometry/trig hump and reached out to George Profenza, who previously helped me track down Rob Bell’s missing Polar Zonohedron SketchUp script for quickly creating PZ’s. He got me up to speed with Three.js and wrote the first iteration of a frame generator called Modwerk. I’m eternally grateful to him for that.
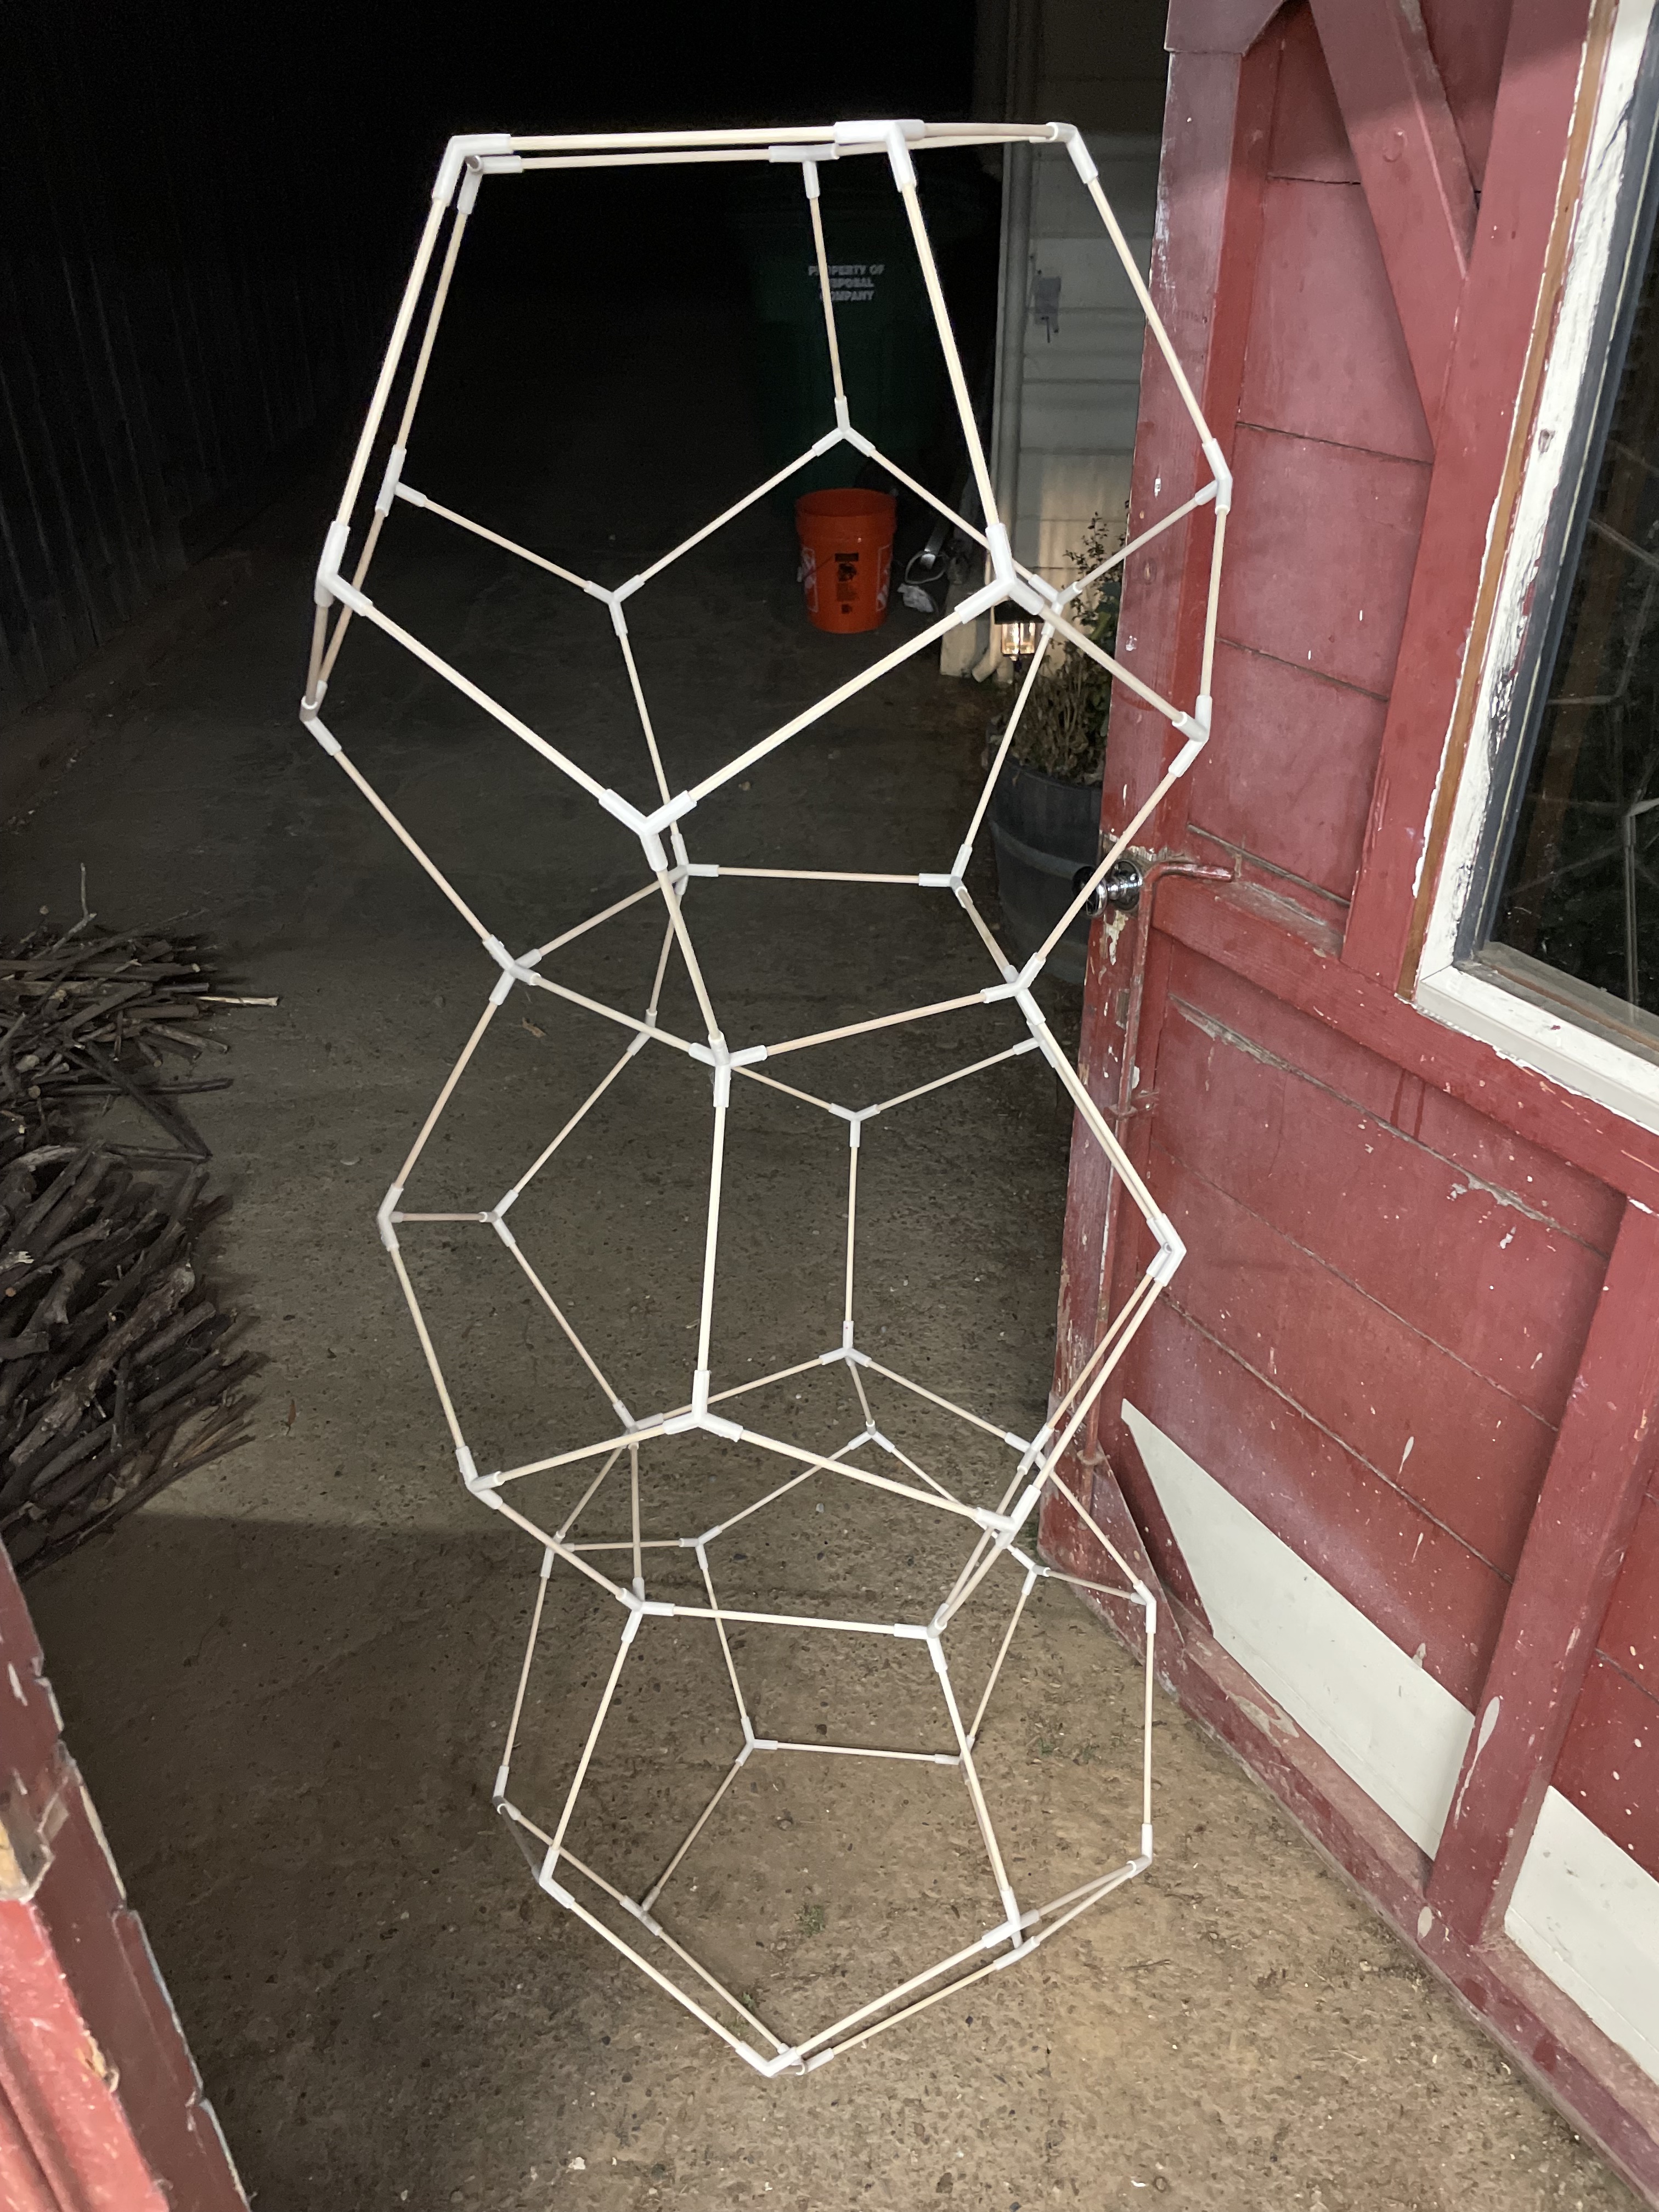
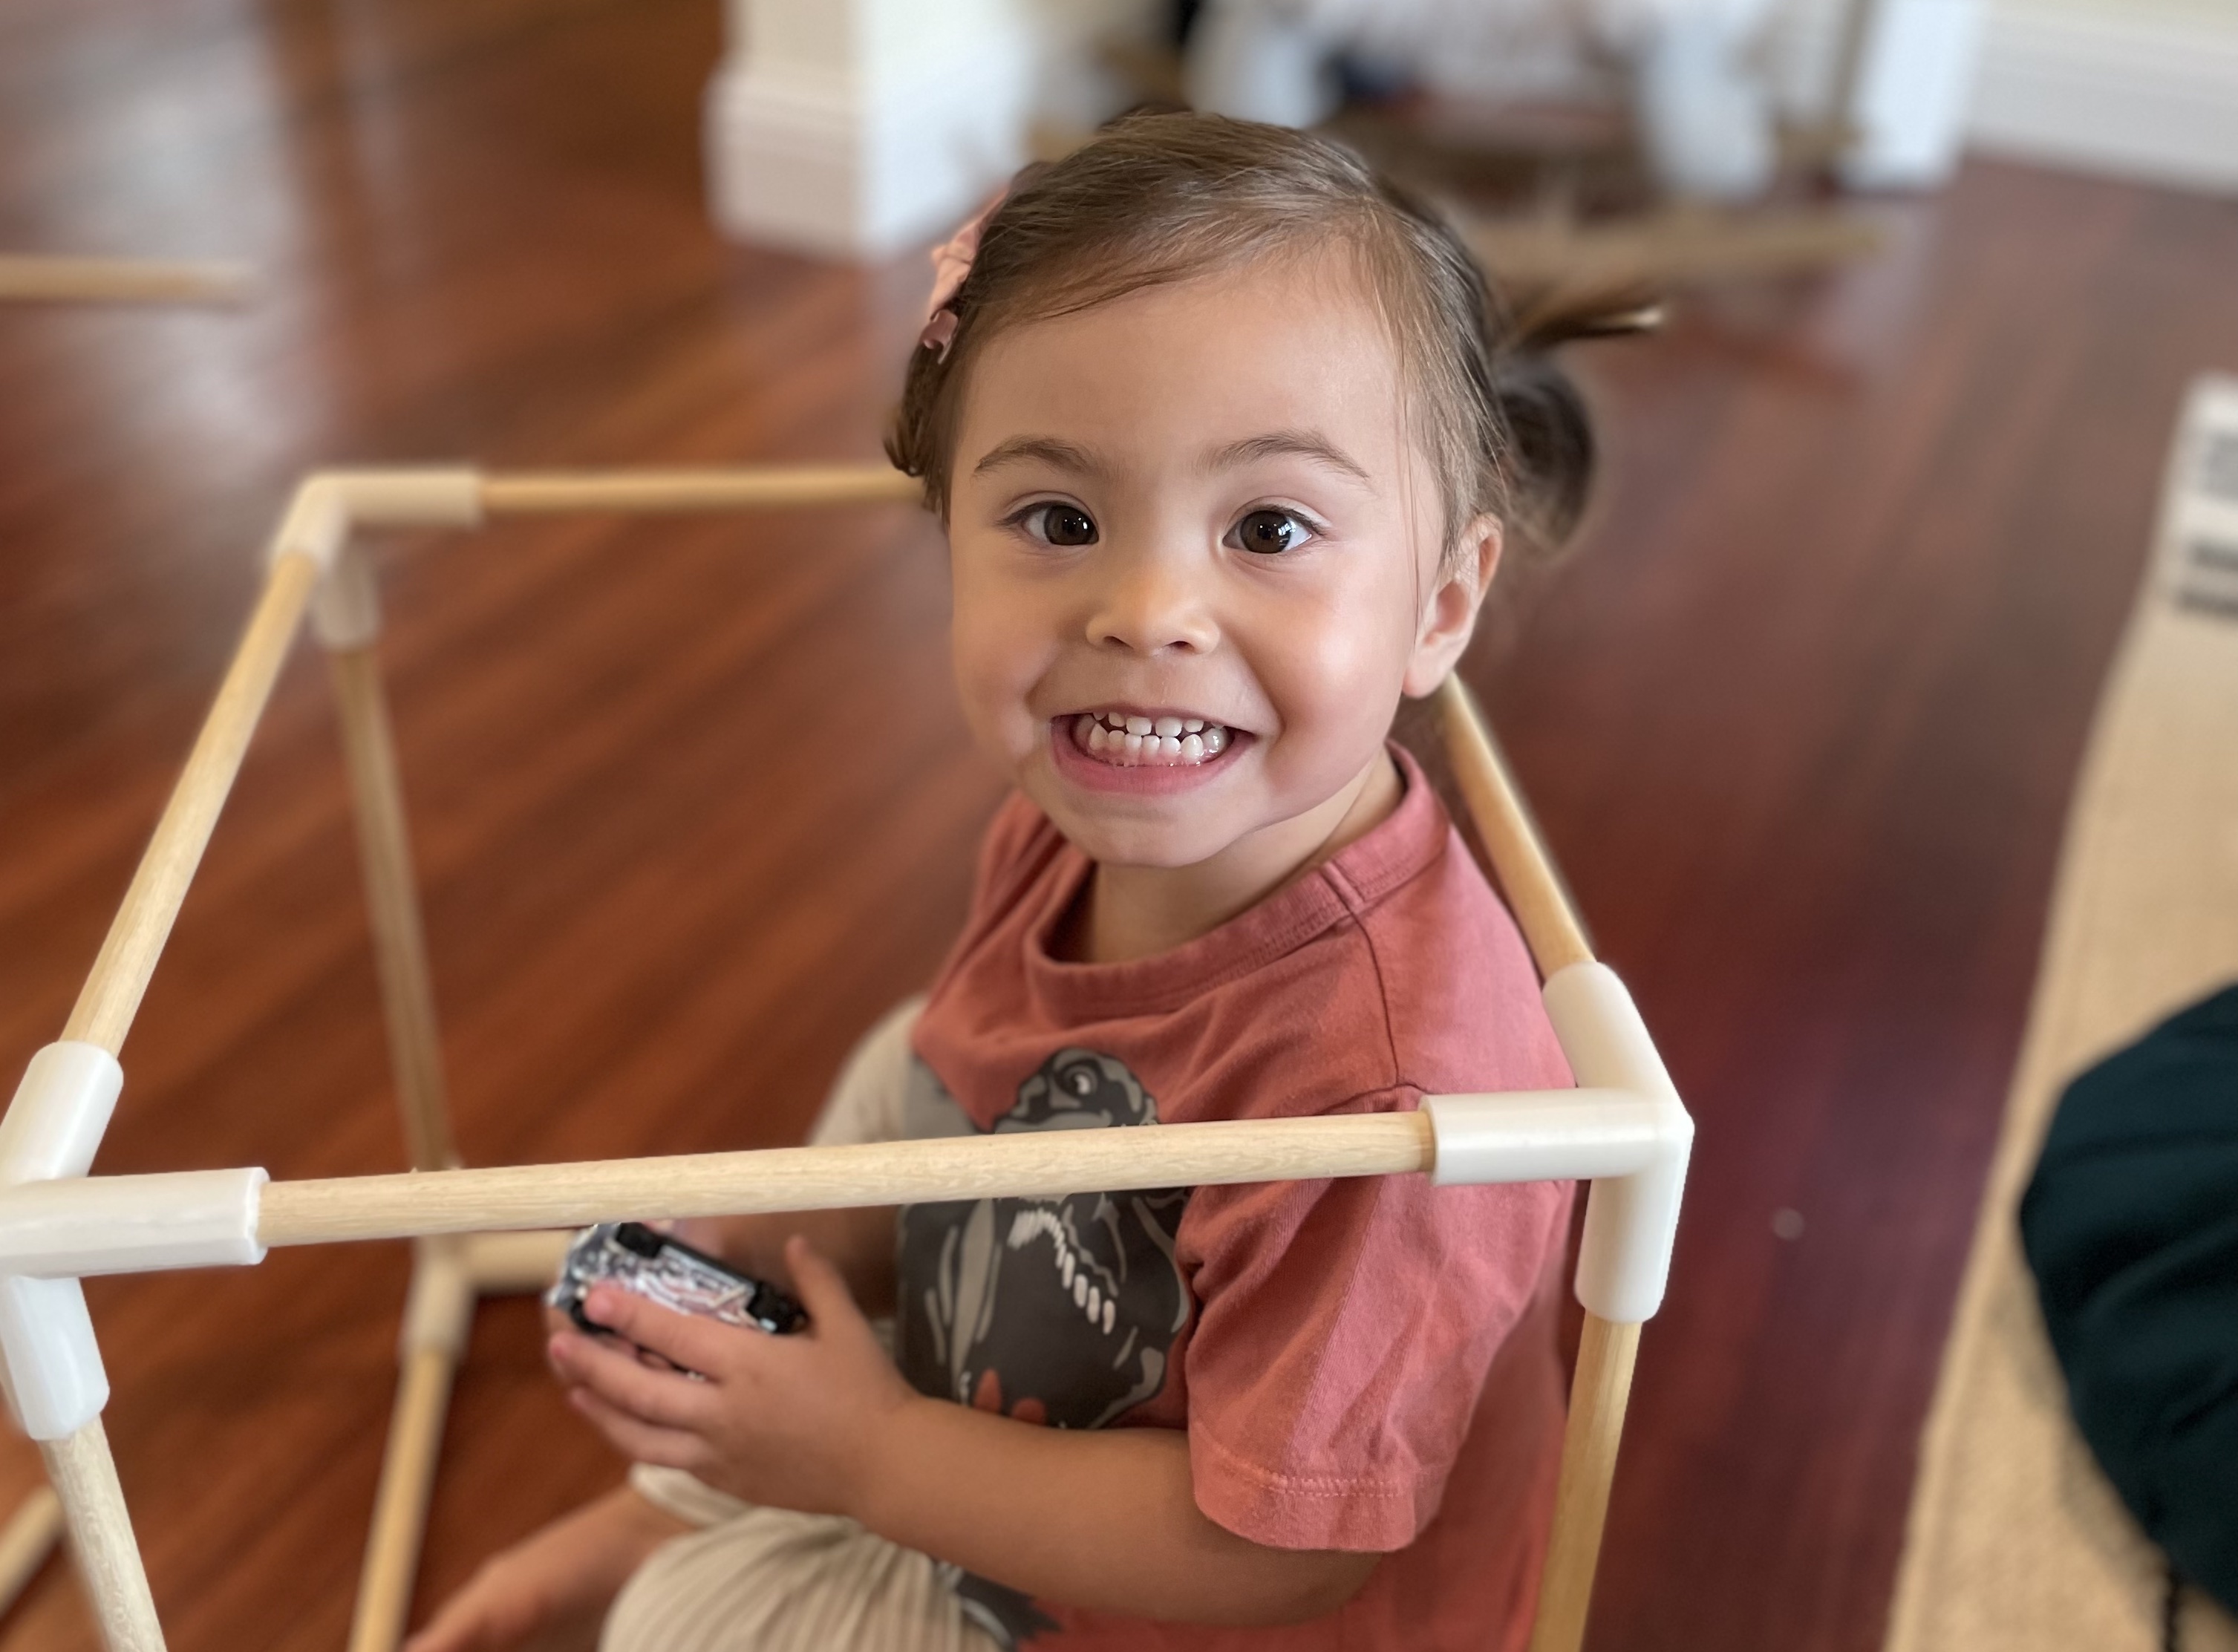
I’ve built numerous frames using it and even did a live demo at a local maker space, Chimera Arts, where people loved making things with connectors and stretching their creative muscles.
More on Modwerk
How it works
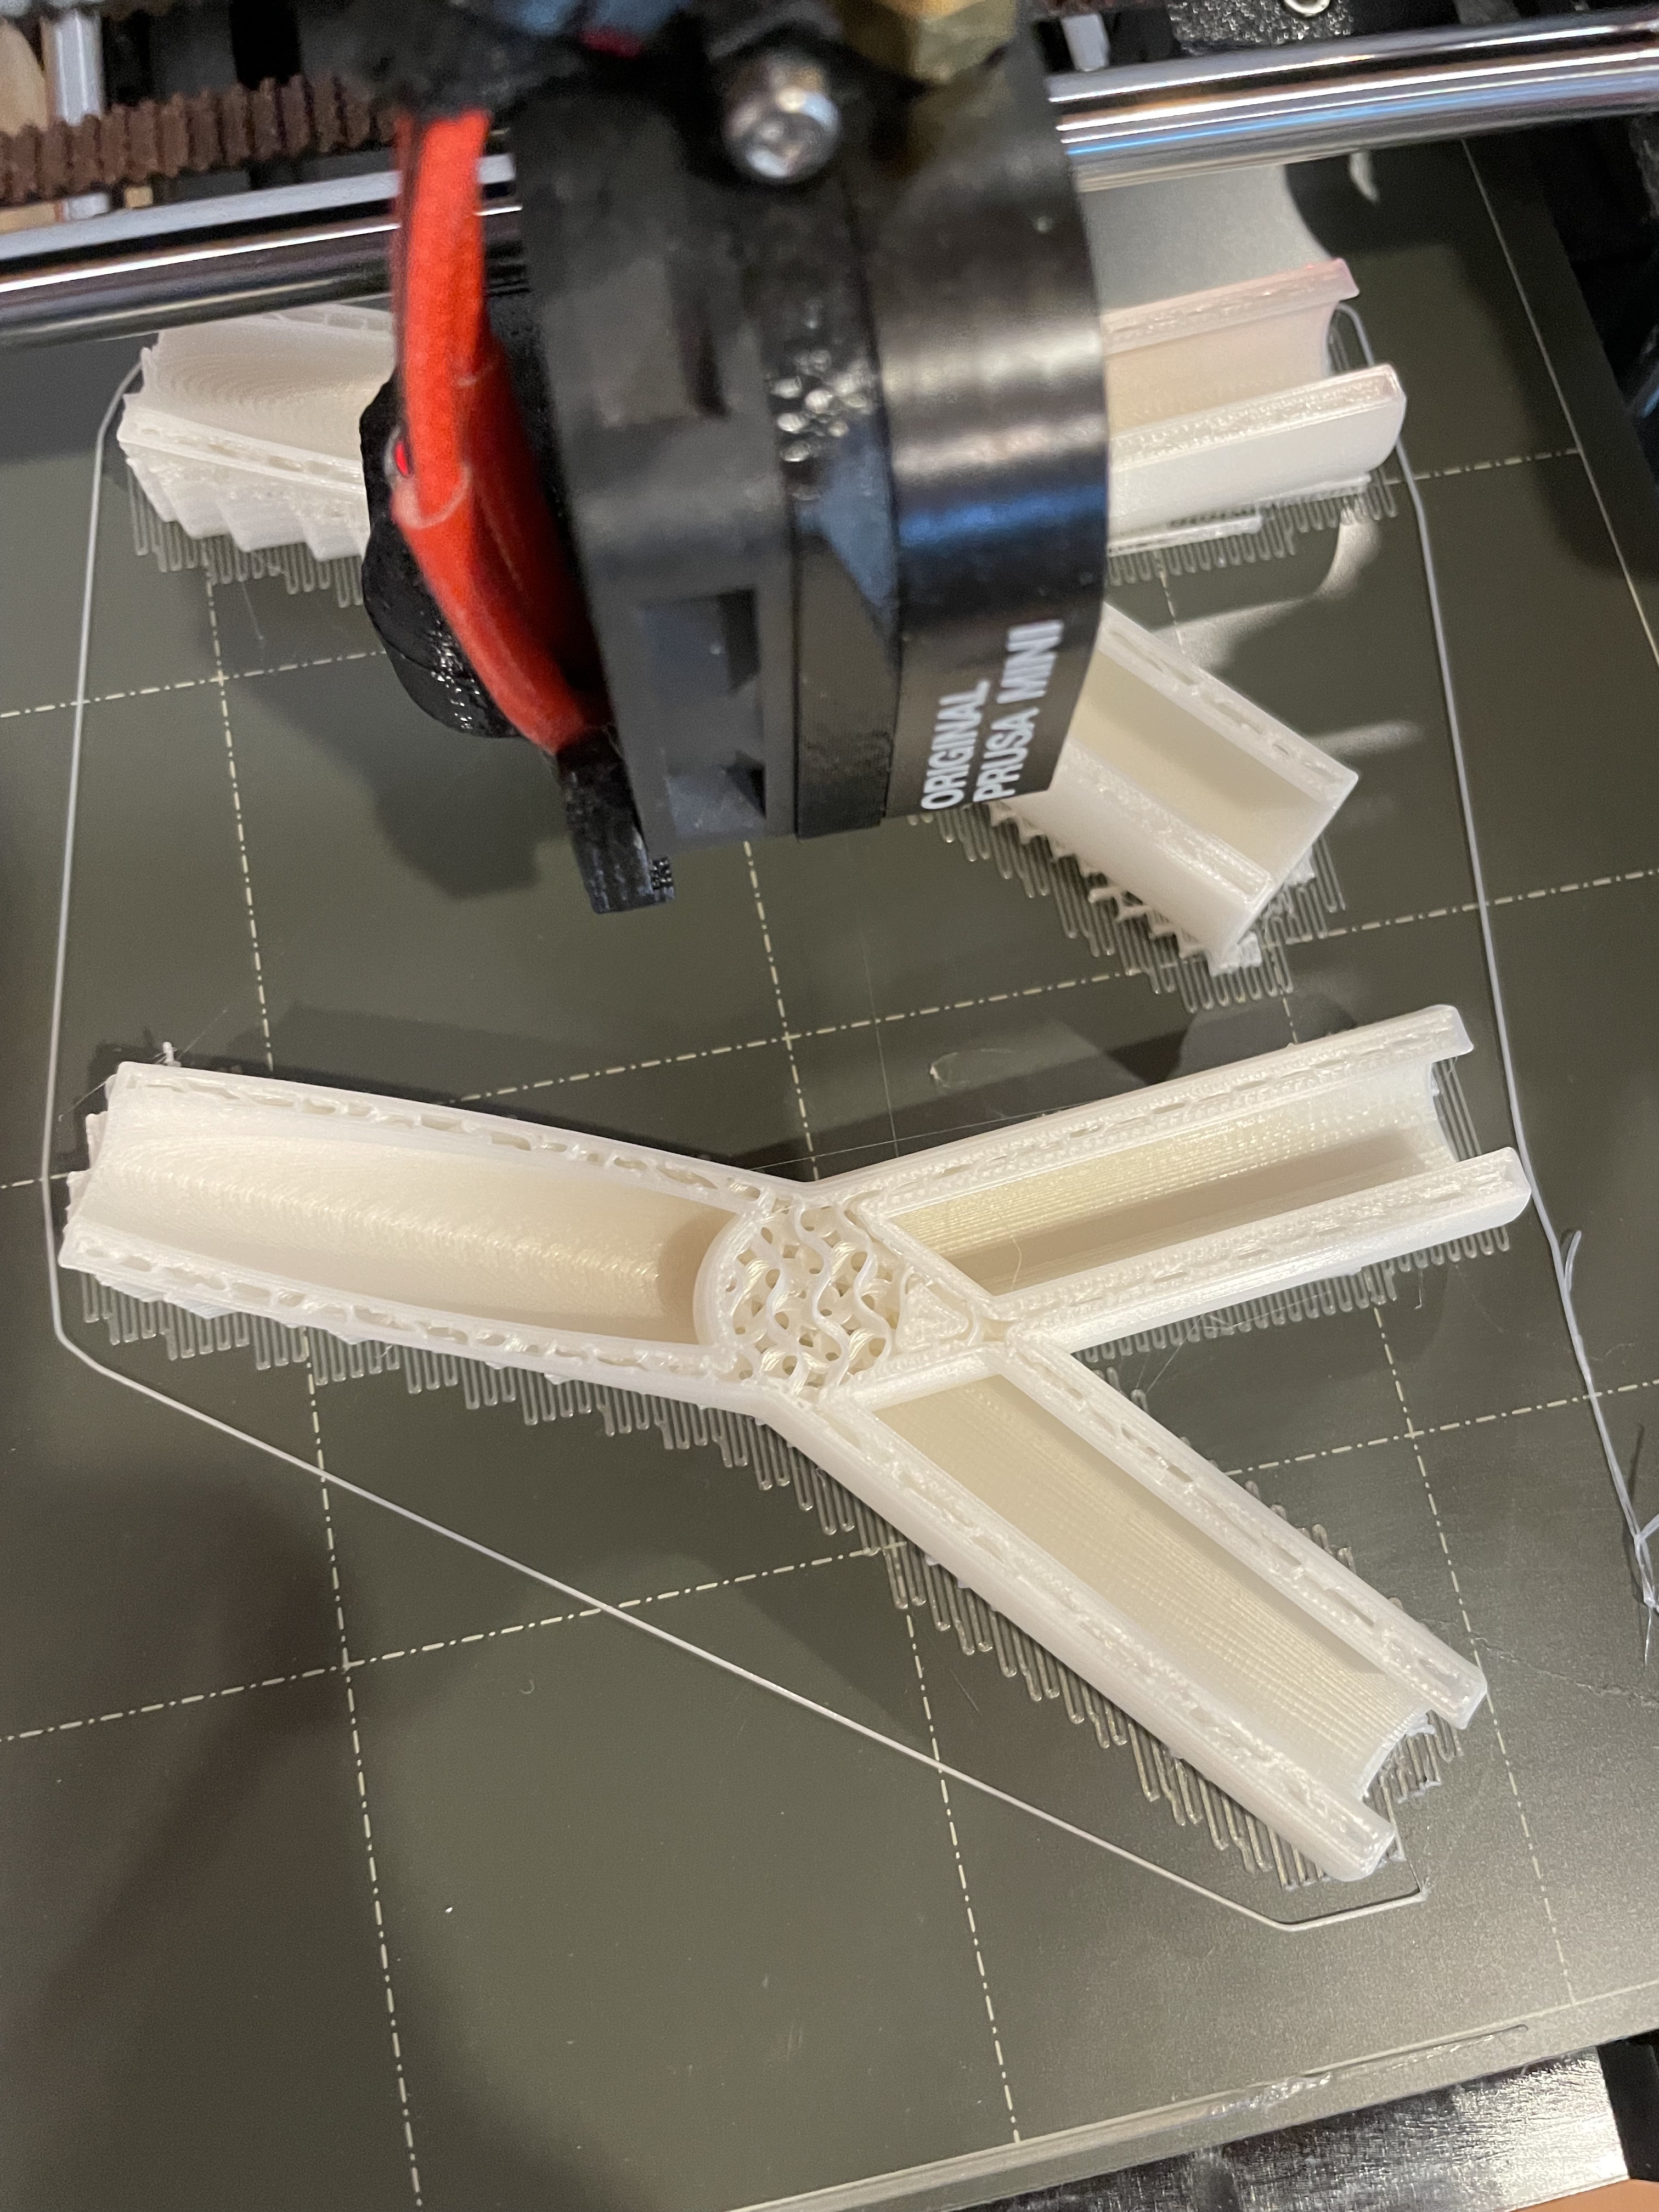
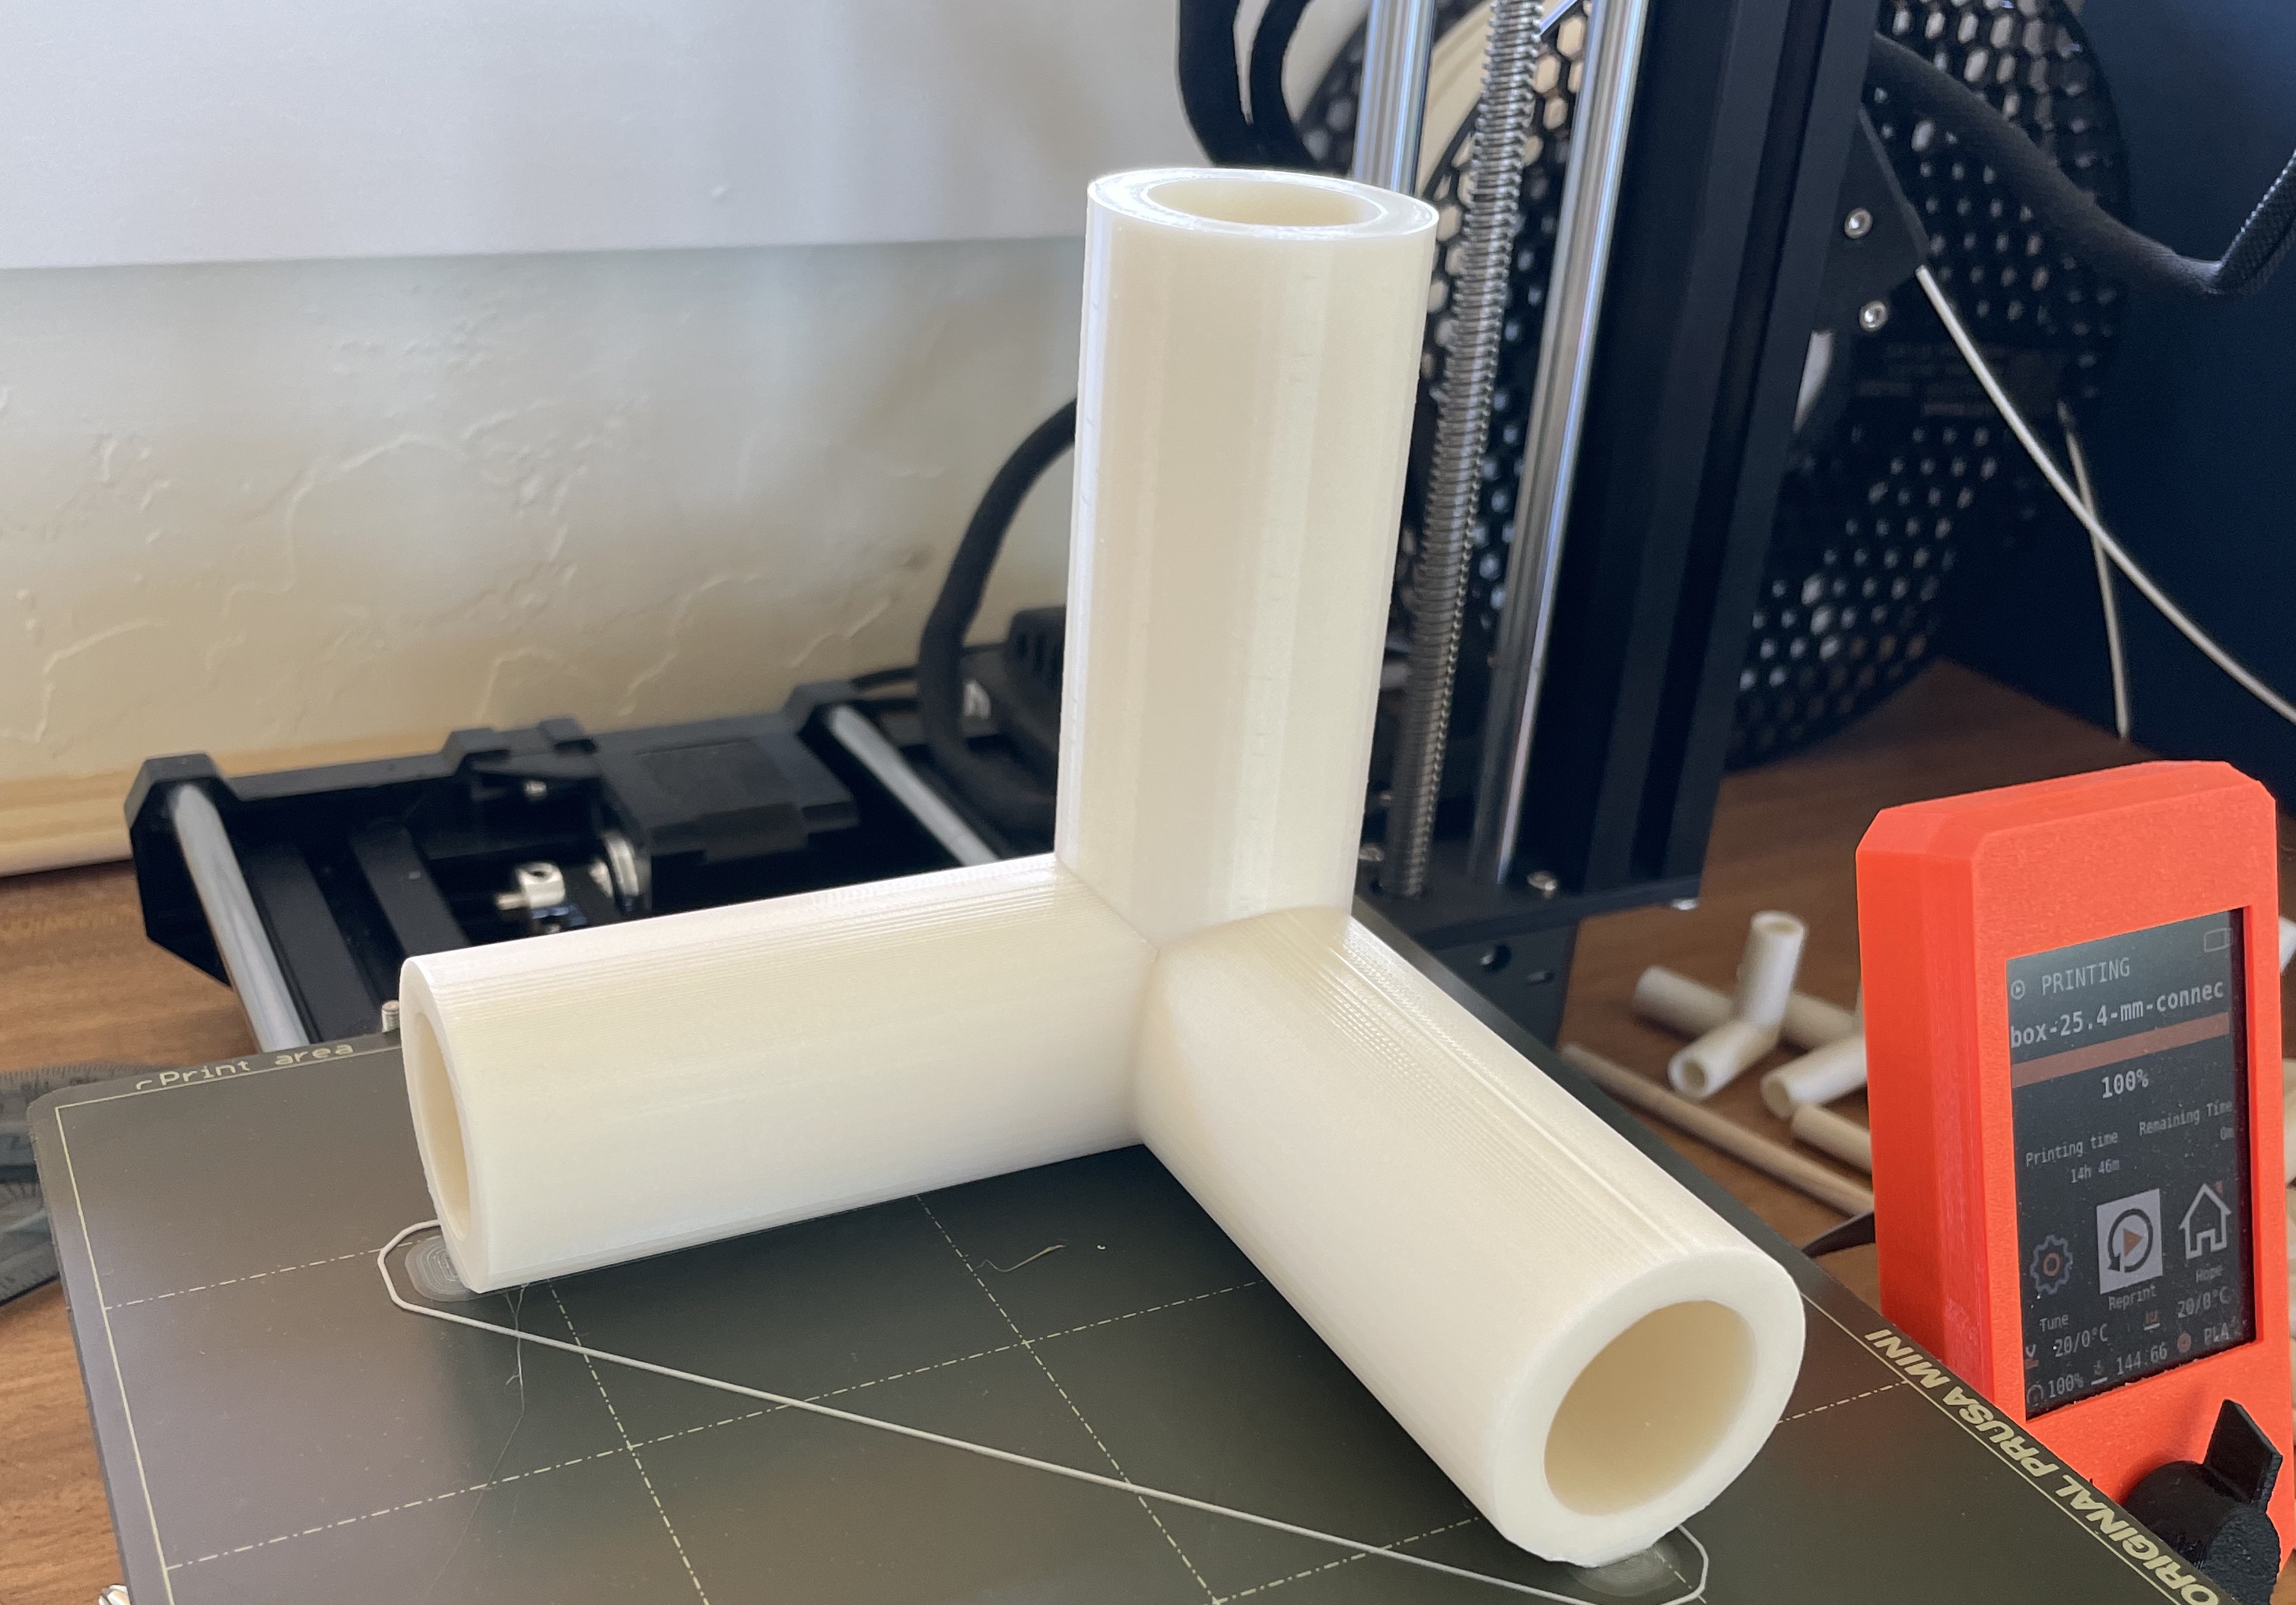
Modwerk is a web app I built that makes the process of converting a solid 3d shape into a frame that consists of rods and connectors. You can think of the rods as wooden dowels, PVC pipes, or metal tubing, and the connectors are kind of like plumbing fittings. The exception is the connectors aren’t limited to a small set of pre-defined shapes, like an elbow, a wye, a coupler, etc, and you aren’t limited to 2, 3, or 4 openings. Theoretically, there are infinite connector configurations that could be generated depending on the complexity of your shape.
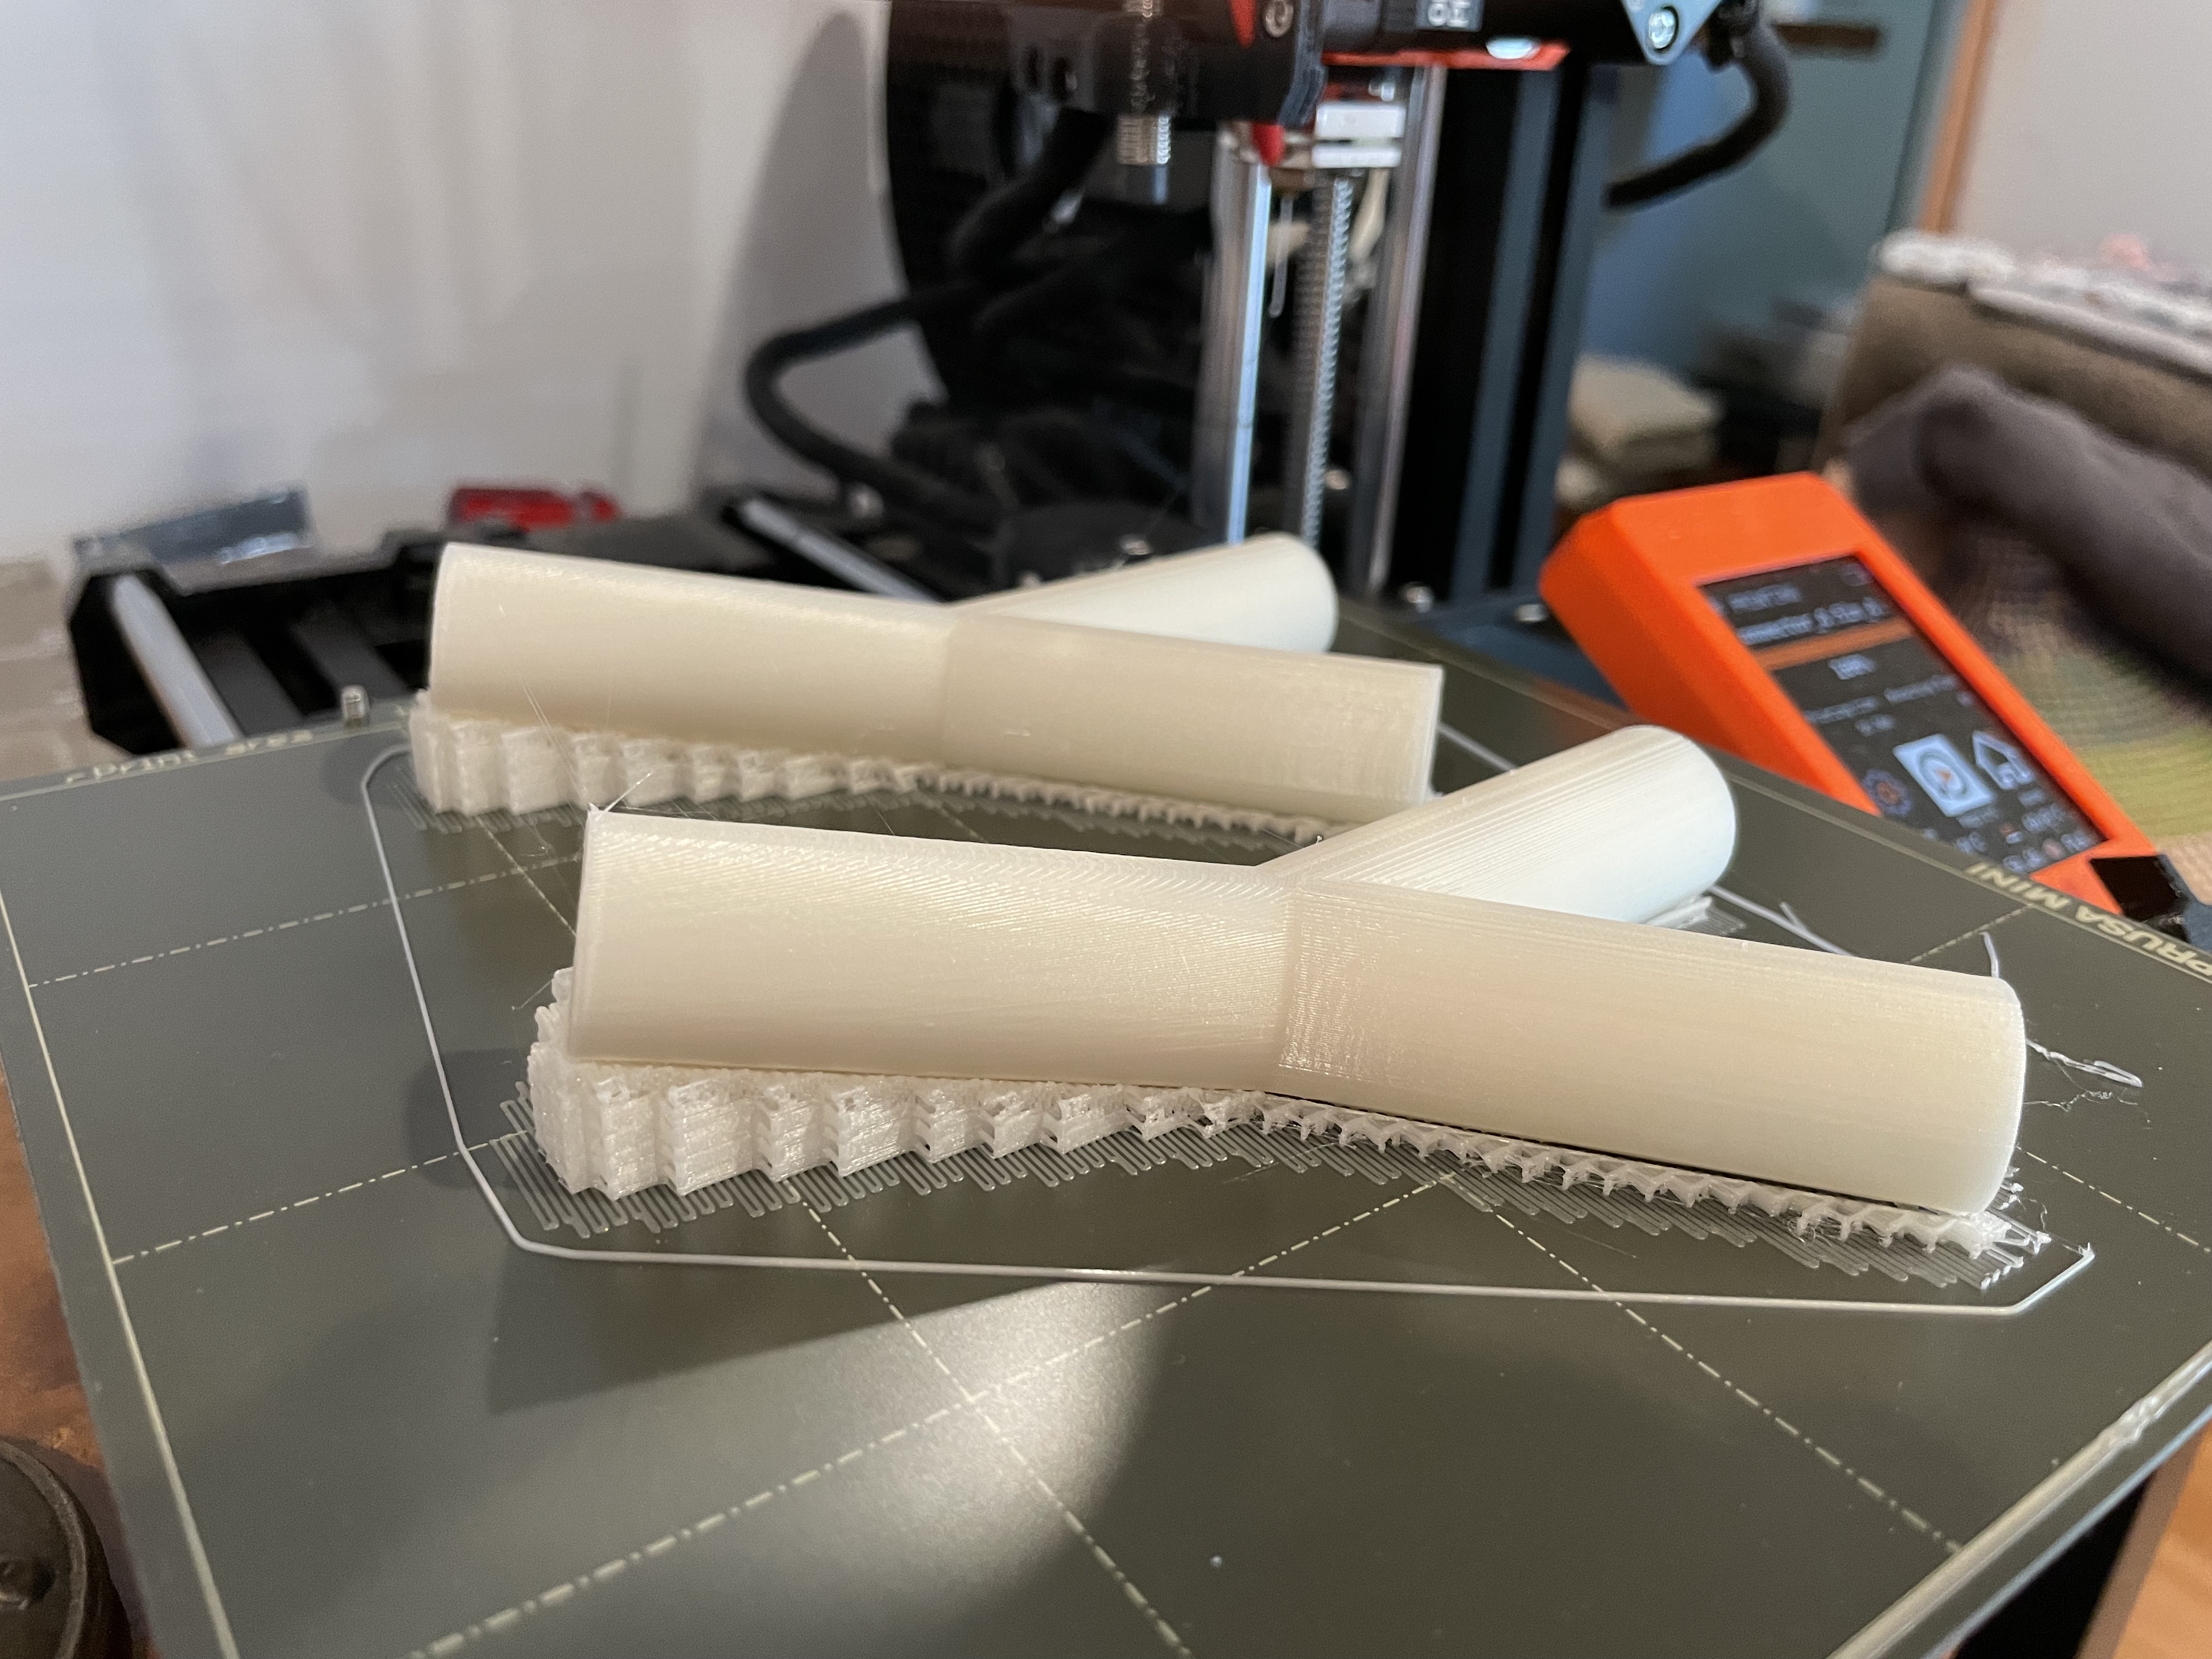
There are two ways to start—you can either use a predefined shape from the shape palette, or you can upload a shape you’ve already made in another CAD program like SketchUp, Fusion360, Blender, etc. Once you have the shape, you convert it to a frame with the click of a button and export the parts. You can print them at home if you have a printer, or you can order prints from Shapeways or another 3d printing service.
Assembly
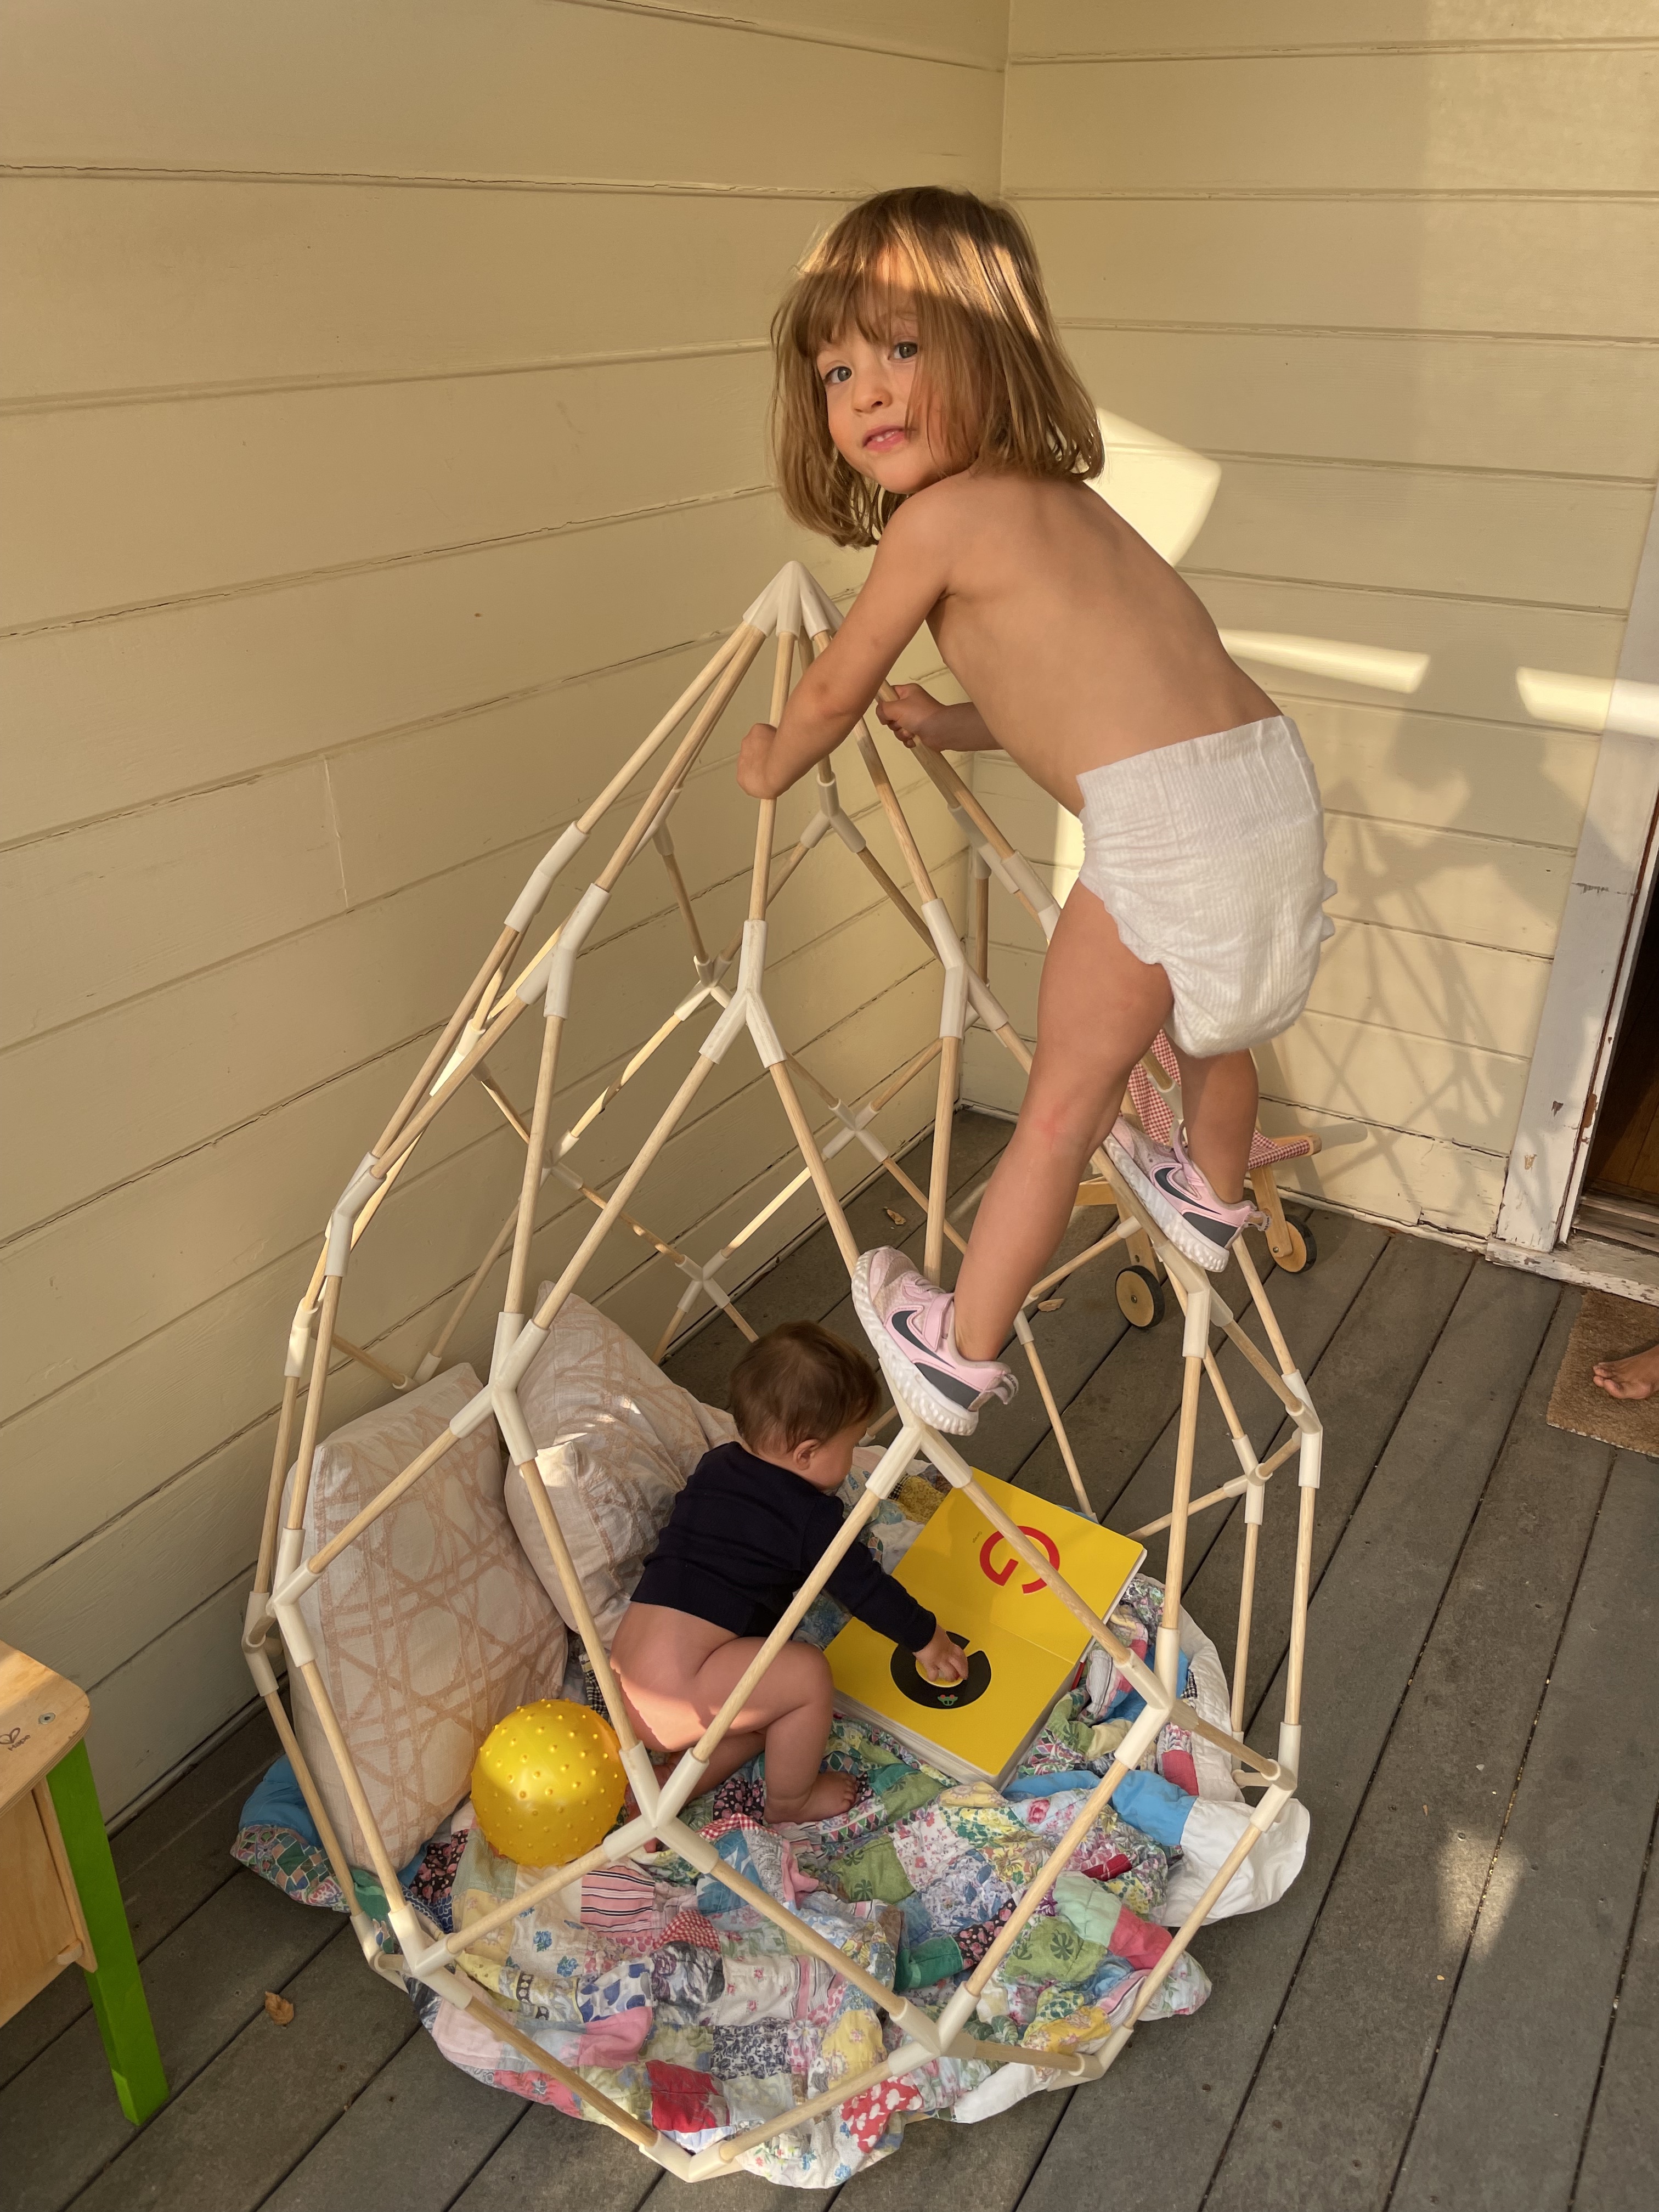
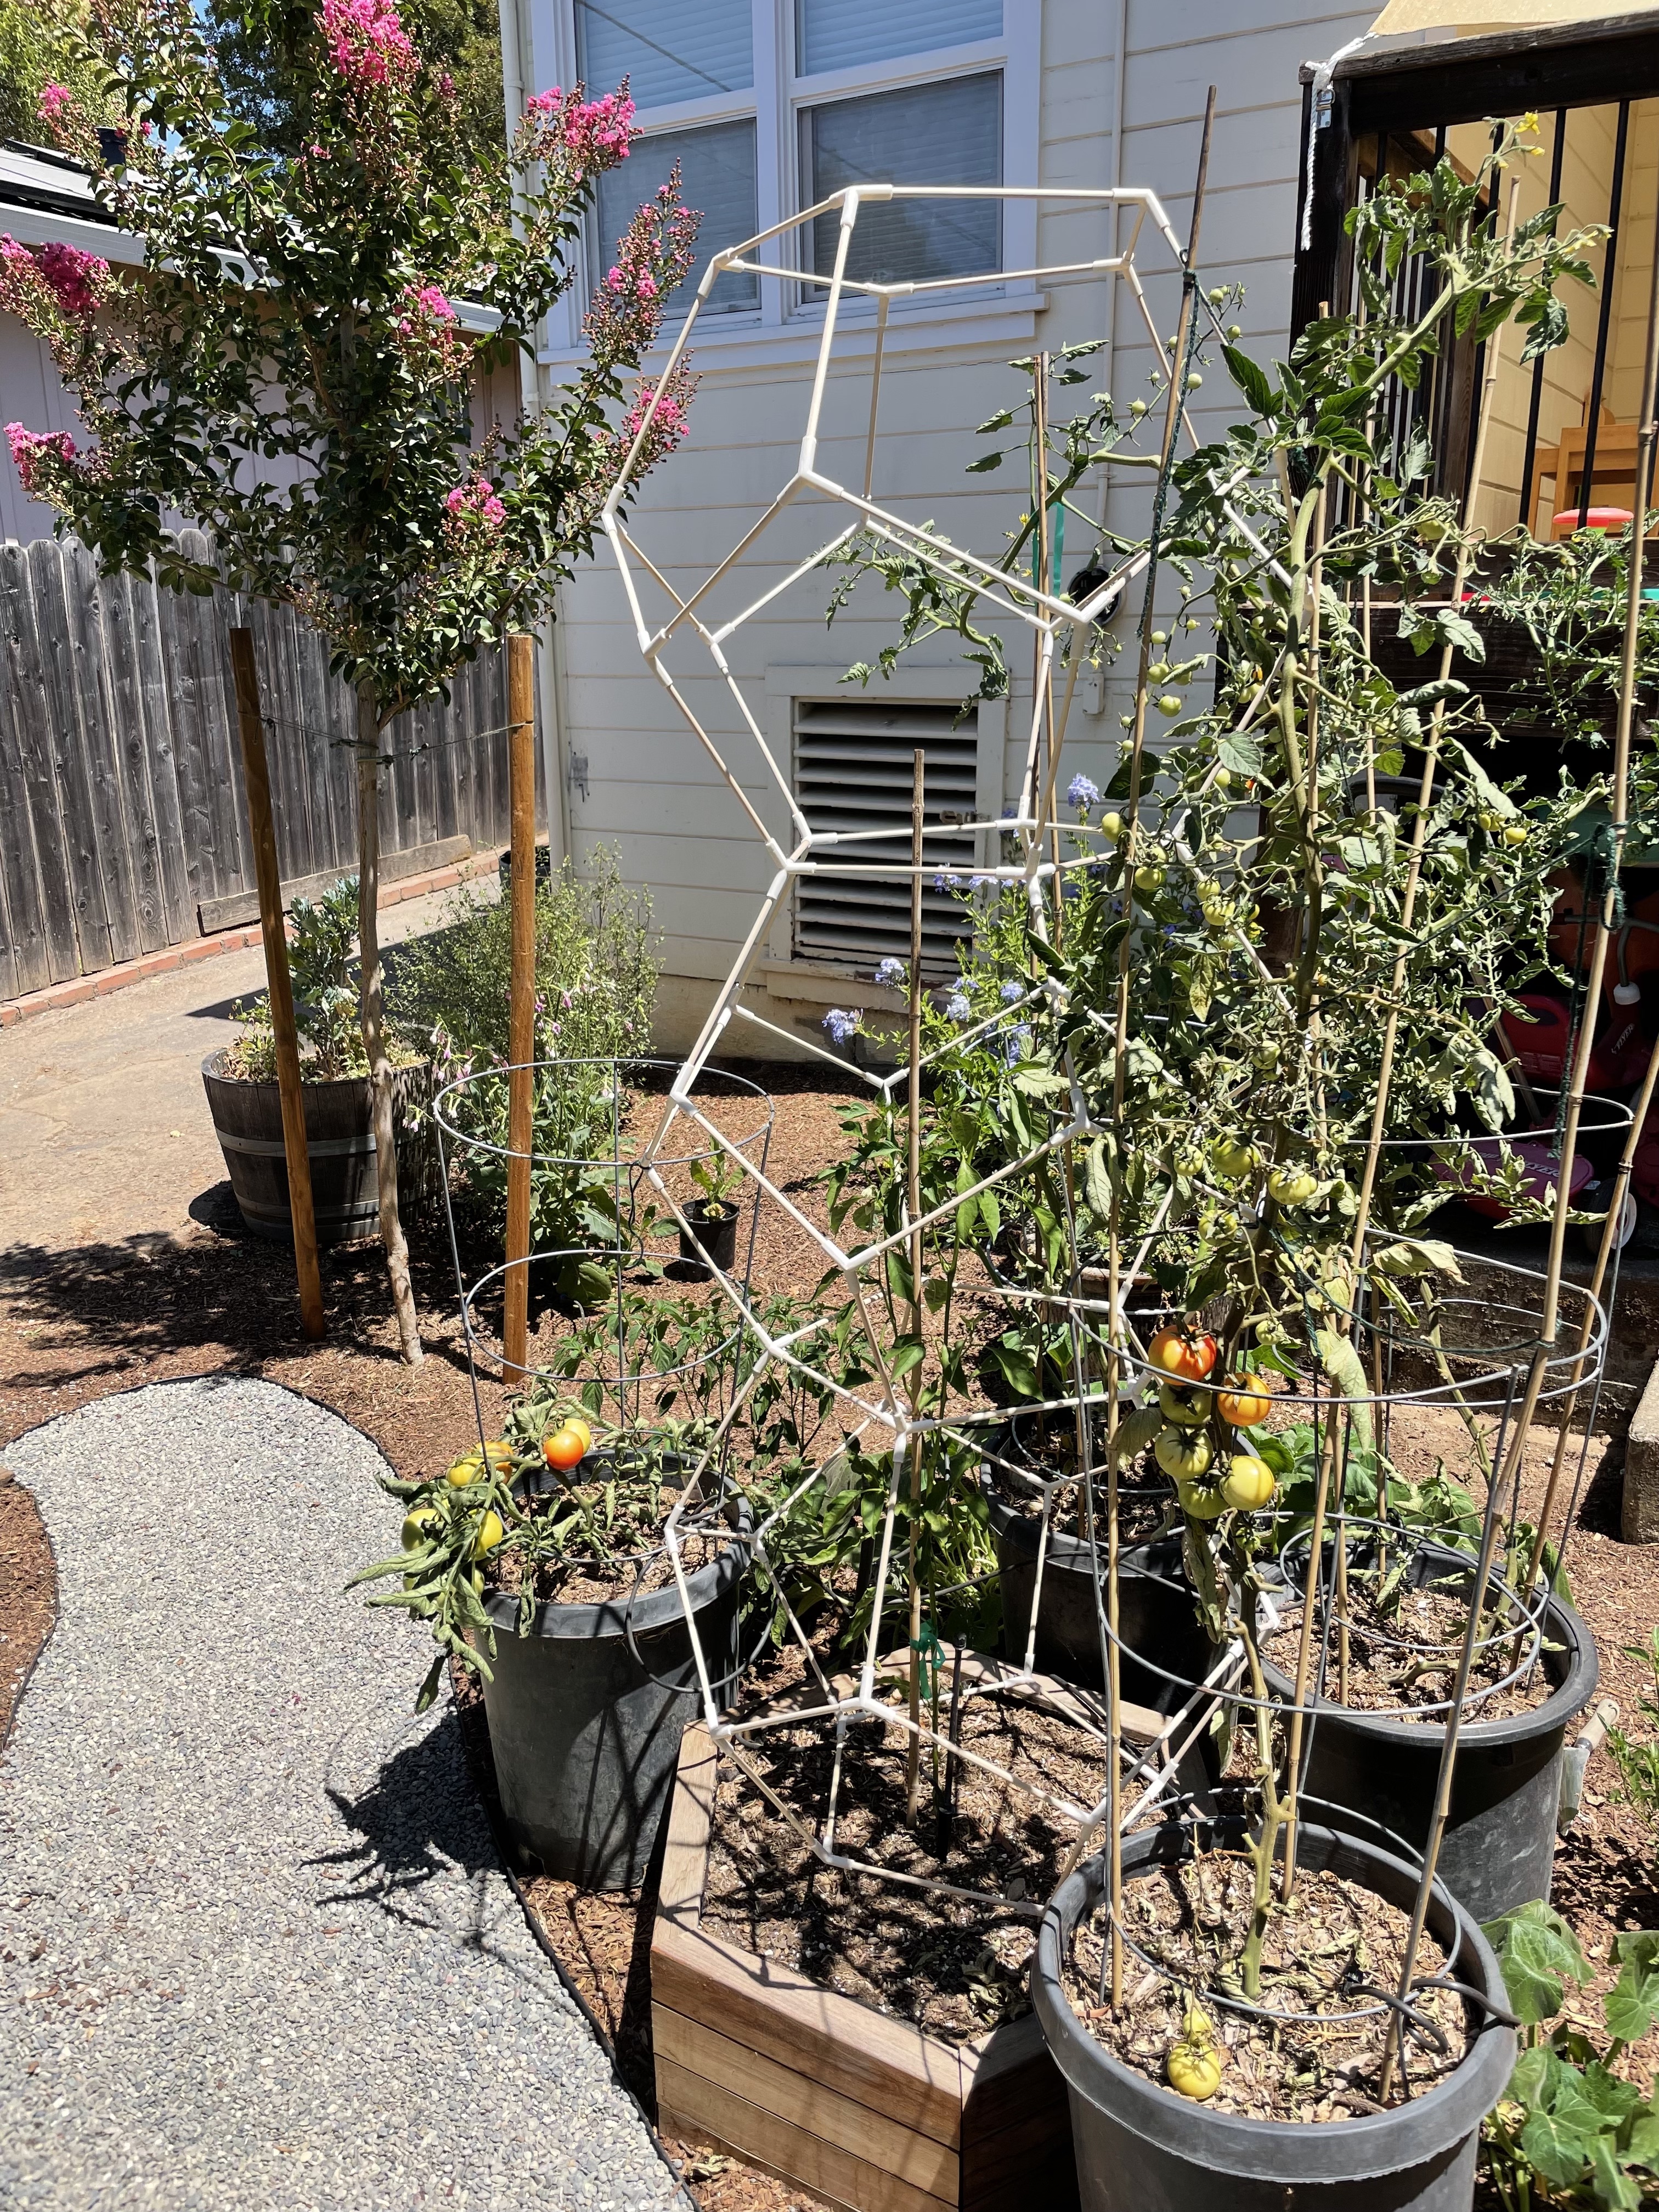
For simple shapes, assembly is pretty straightforward. All the shapes in the shape palette have equivalent length edges, making it a breeze to cut and assemble. I typically use wooden rods but have recently been experimenting with aluminum tubing and PVC. Wood is relatively inexpensive but the diameter can vary widely which can be problematic if you want to pressure-fit the pieces. If you are looking for more strength and a pressure fit, metal and plastic rods are a good option, yet more expensive. It’s worth experimenting with materials and print types to get the right attributes you might be looking for.
Technical Breakdown
I plan on doing a more in-depth technical breakdown of Modwerk in the future, but from a high level, it’s a client-only web app. The first version was written in Svelte, but I ran into some limitations with that and found it slow to iterate. V2, which hasn’t been released yet, is a complete rewrite in React that uses React Three Fiber on the FE and will have a Ruby on Rails REST API for handling saving projects and payments.